
One Printer, Several Plastics, Several New Problems
The interesting part of multi-material printing is not simply putting different colors into the same object. Different materials can give different parts of one print entirely different mechanical properties.
A rigid body can have a flexible gasket. A decorative surface can use translucent inlays. A complex nylon part can be surrounded by support material selected specifically because it does not want to stick around afterward.
That last property is more important than it sounds.
I tried three projects to see where these combinations work and where the materials decide they would rather pursue separate careers:
- A PLA, PETG, and TPU drink coaster
- A PLA enclosure with integrated TPU seals
- PAHT-CF sunglasses printed with removable support structures
All three printed. Getting them to print well was another matter.
The Coaster That Immediately Disassembled Itself
The first project was a drink coaster printed primarily from PLA matte filament. I added translucent PETG inlays for the logo colors and TPU feet on the back.
On paper, this was exactly the kind of thing a multi-material printer should be good at.
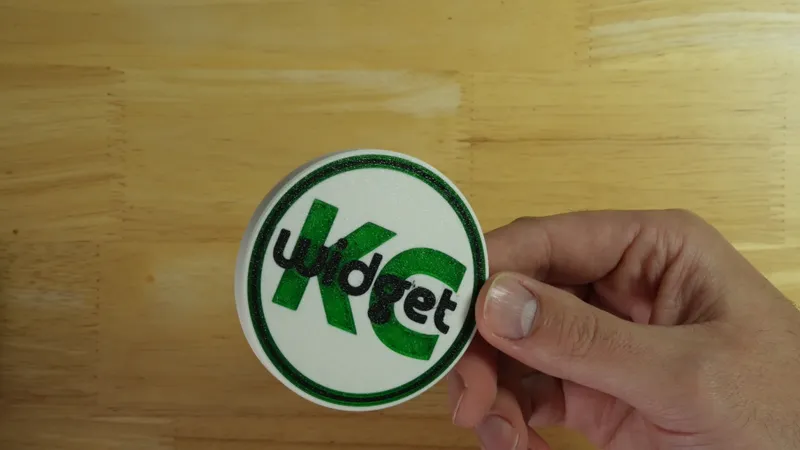
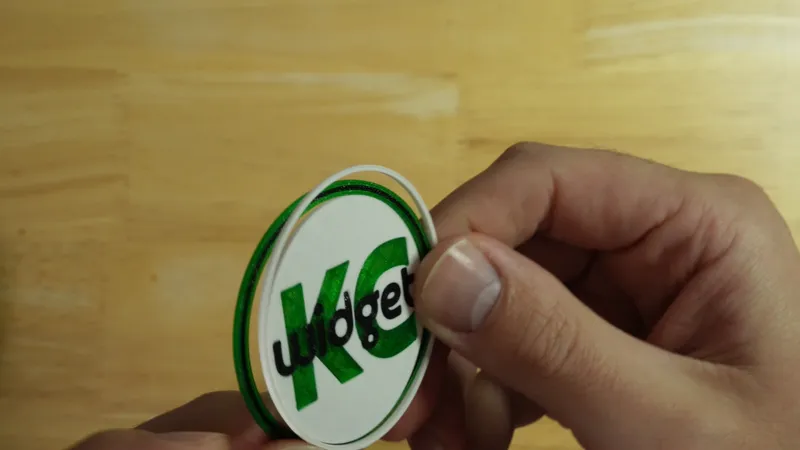
The first version fell apart almost immediately after I removed it from the print bed.
PLA and PETG do not bond particularly well to each other. TPU adhered to PLA a little better in this print, but still not well enough that I would design a mechanically important joint around adhesion alone.
Making the Materials Stay Put
Rather than expecting the PETG to chemically bond to PLA, I changed the geometry so it could not easily escape.
I made the entire back of the coaster PLA, trapping the PETG so it could only release in one direction. I also printed the coaster face-down. The first layer squishes the neighboring materials together and creates a useful mechanical connection at the surface.
The TPU feet stayed essentially unchanged. Their adhesion was sufficient for a low-load feature like a coaster foot.
These changes worked, but there is a cleaner way to handle this problem if the slicer supports it.
Beam Interlocking Does the Tedious Part
Bambu Studio includes a feature called Beam Interlocking. Instead of depending entirely on adhesion between two incompatible materials, the slicer generates a cross-hatched interface that mechanically connects them.
In other words, the plastics still do not particularly like each other. They just have fewer opportunities to leave.
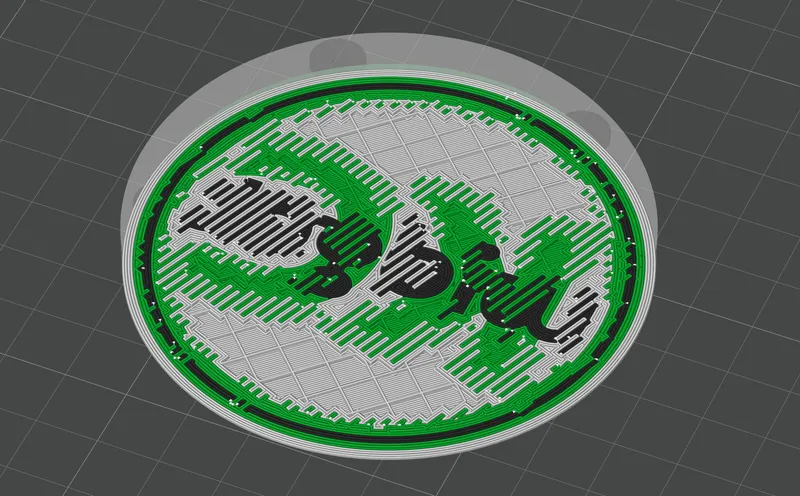
To enable it in Bambu Studio:
Advanced Mode
  → Others
    → Use Beam Interlocking
For the materials I tested, Beam Interlocking worked especially well for PLA/PETG inlays and also helped with PLA/TPU integration.
There is a limitation. I could not selectively choose which material interfaces should receive the interlocking treatment. On a part with screw holes, for example, I did not necessarily want PLA beams crossing into those areas, but there was no way to selectively exclude them.
It is still a remarkably useful setting, particularly when the alternative is modifying the CAD model with a collection of tiny mechanical retention features.
Which, naturally, I had already done on the next project.
Printing a Water-Resistant Enclosure in One Piece
The project box combines a rigid PLA matte body with TPU 90A for the lid gasket and flexible cable-pass-through walls. Two holes on the bottom provide mounting points for attaching the enclosure to another structure.
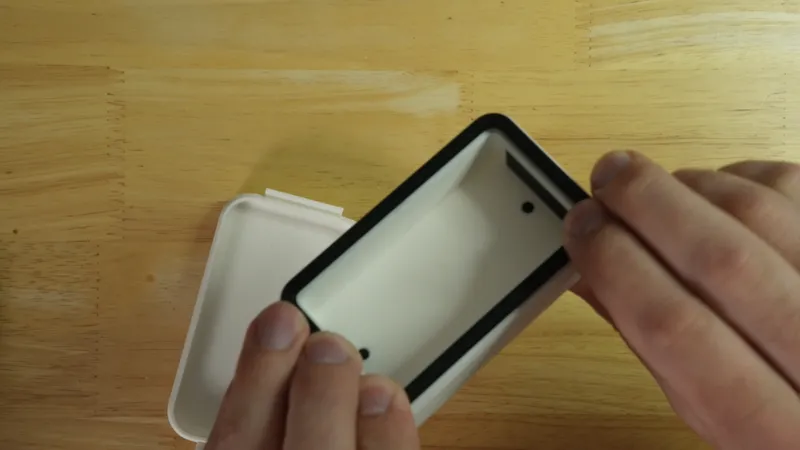
This is where multi-material printing becomes much more interesting than simply adding another color.
One print can produce:
- A rigid enclosure
- A flexible gasket
- Flexible cable-sealing ports
- Integrated interfaces between all three
There is no separate gasket to install and no cable seal to glue into place.
Assuming, of course, that the gasket actually seals.
Not All TPU Is Equally Flexible
My first attempt used TPU 68D, sometimes sold as TPU intended for automated material systems. It printed, but it was too stiff to make a reliable water seal. The test enclosure leaked.
Switching to TPU 90A made a significant difference. The softer material compressed properly and produced the tight seal I was looking for.
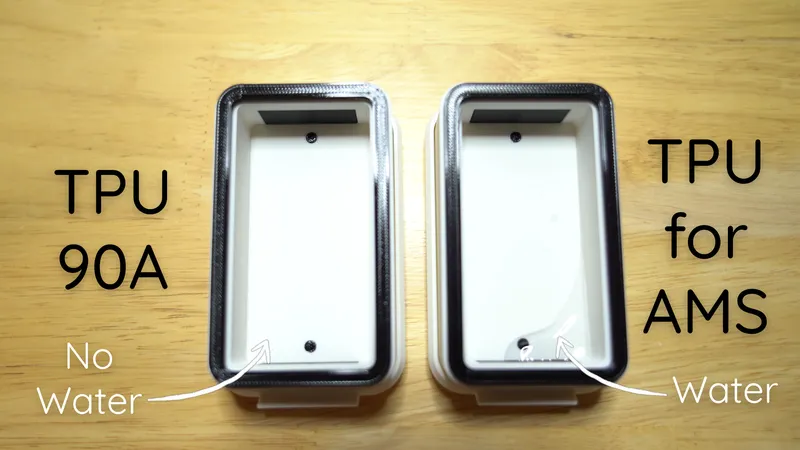
Because PLA and TPU do not form a particularly strong bond, I had already modeled channels into the enclosure to mechanically retain the flexible sections.
They worked.
Then I learned about Beam Interlocking.
So those carefully modeled retention channels became a nice reminder to check the slicer settings before spending an evening solving the problem in CAD.
For future designs, Beam Interlocking can provide much of that mechanical connection automatically.
A practical note here: a successful leak test does not turn a printed enclosure into a certified waterproof electrical enclosure. Layer lines, print defects, cable interfaces, and repeated gasket compression can all affect sealing. For electronics exposed to water or safety-critical environments, use appropriately rated hardware and test the finished assembly for its actual application.
The Sunglasses Created a Different Material Problem
The third project was a pair of curved, print-in-place sunglasses made from PAHT-CF, a carbon-fiber reinforced nylon.
The geometry requires substantial support material.
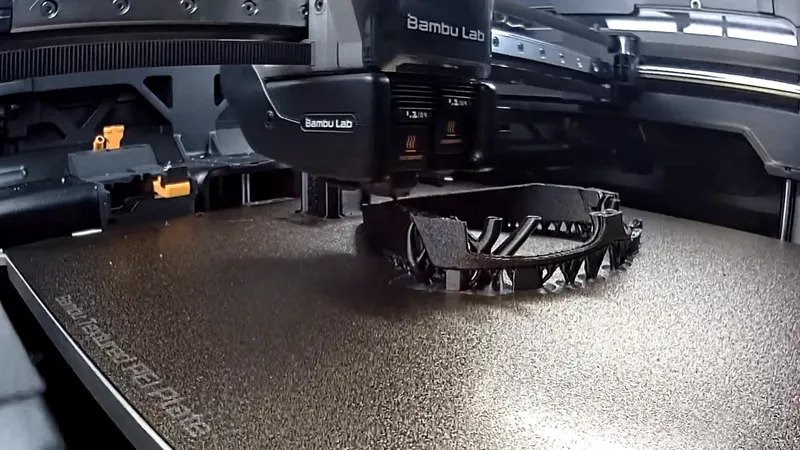
Support material creates a slightly different optimization problem. It has to stick well enough to hold the part during printing, but poorly enough to come off afterward.
Those goals are not as compatible as one might hope.
Dedicated Support Material Was Not the Cleanest Option
I first tested dedicated PA support material with the PAHT-CF frames.
It bonded too well.
After removal, some of the green support material remained attached to the black PAHT-CF surface.
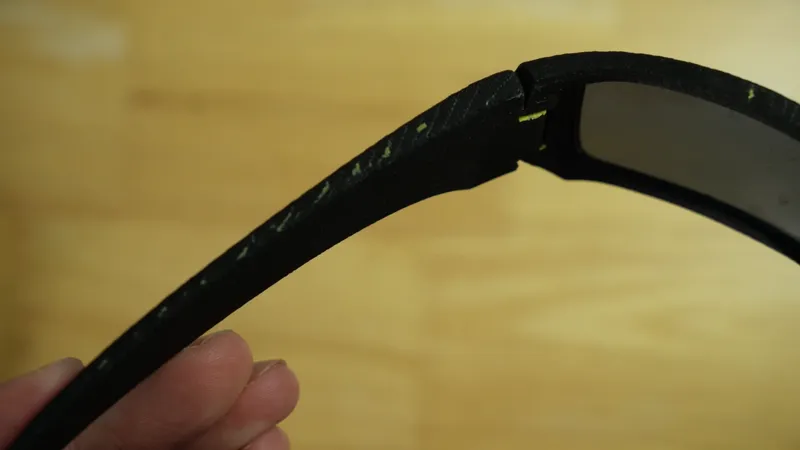
I also experimented with ABS and dedicated ABS support material. That combination was better, but support removal still left some material behind.
There is an important detail with dedicated support filaments: they are generally intended for the interface between the support structure and the printed part, not necessarily for building the entire support volume.
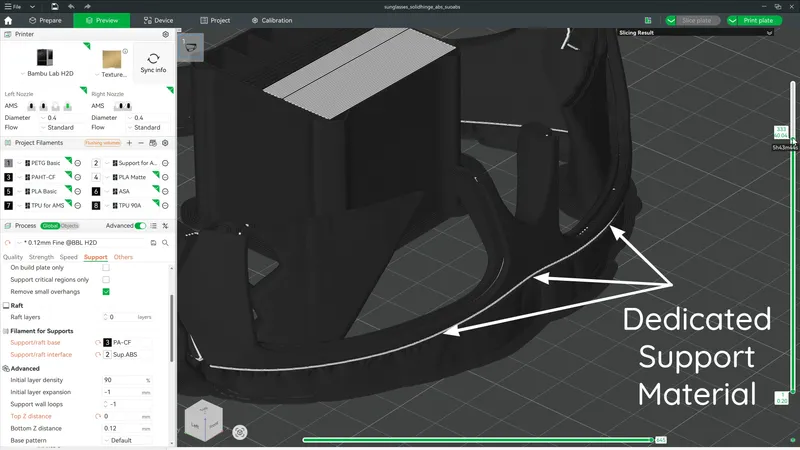
The rest of the support therefore needs to be printed from something else. Using the same engineering filament as the actual part is an obvious option, but it can also be an expensive way to manufacture a pile of material whose eventual job description is "trash."
PAHT-CF is not exactly the filament I want volunteering for that position.
ASA Turned Out to Be the Better PAHT-CF Support
The combination that worked best in my testing was PAHT-CF for the sunglasses and ASA for the supports.
ASA prints at temperatures compatible enough with PAHT-CF for this application, costs considerably less than filling the entire support structure with PAHT-CF, and separated extremely cleanly afterward.
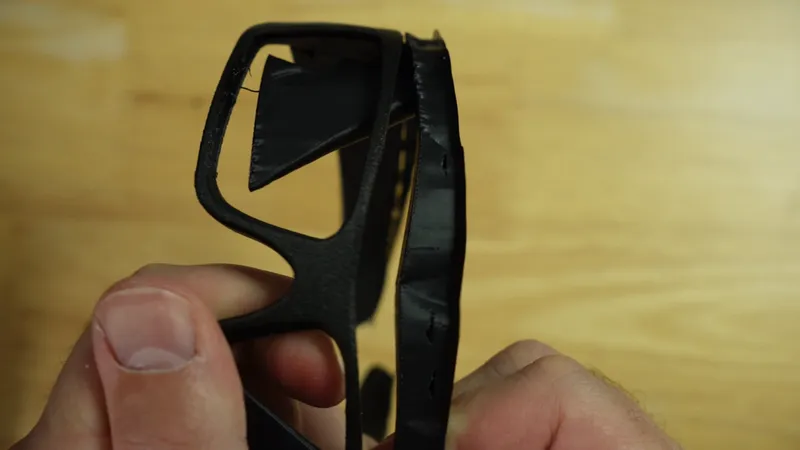
The ASA supports:
- Held the part securely during printing
- Peeled away easily afterward
- Were close enough in color that microscopic residue was difficult to notice
- Cost substantially less than using PAHT-CF for the support volume
For this particular geometry and material combination, ASA worked better than the dedicated nylon support material I tested.
That does not make ASA a universal nylon support filament. Temperatures, geometry, printer settings, surface area, and the exact polymers involved can all change the result. But for these PAHT-CF sunglasses, the pairing worked extremely well.
Material Incompatibility Can Be Useful
The common lesson from all three projects is that successful multi-material printing does not necessarily mean finding materials that naturally bond together.
Sometimes the lack of adhesion is the useful property.
For the coaster, poor PLA/PETG adhesion was a problem until mechanical interlocking compensated for it. For the project box, weak PLA/TPU adhesion meant the flexible sections needed mechanical retention. For the sunglasses, easy separation between PAHT-CF and ASA was exactly what made the support material work so well.
The trick is deciding whether an interface should stay together or come apart, then choosing the material and geometry accordingly.
Beam Interlocking is particularly useful when the answer is "stay together." For support structures, the goal is almost the opposite.
And if there is one especially reliable conclusion from these experiments, it is that PLA should probably not be expected to form a lasting emotional attachment to much of anything.