BIQU CryoGrip Glacier Review: Is This the Best Build Plate for the Bambu Lab H2D?
Updated: Aug 28
When BIQU sent me their CryoGrip Frostbite and Glacier build plates to test on my Bambu Lab H2D, I wasn't looking for a new favorite build plate. My H2D already had a perfectly good build plate. But after several dozen prints, something unexpected happened: I kept reaching for the BIQU Glacier plate instead.
The reason wasn't just lower bed temperatures or energy savings. What really sold me was the combination of reliable adhesion, easy print removal, and the surface finish it produced on matte PLA. So after putting both the BIQU CryoGrip Glacier and Frostbite through a variety of real-world prints, here's what I found.

BIQU CryoGrip Lineup
BIQU's CryoGrip lineup includes different surfaces designed for different printing needs. The two plates I tested were:
CryoGrip Frostbite — a textured plate intended primarily for PLA and PETG
CryoGrip Glacier — a smooth plate designed for a wider range of filaments
Both plates are designed around the same basic idea: strong adhesion at lower bed temperatures. That sounds interesting for two reasons.
Lower bed temperatures potentially mean lower energy consumption.
If the print remains securely attached while the bed is cool, you don't have to wait for a hot build plate to cool down before removing the part.
For someone who does a lot of prototyping, that second advantage may actually be more useful.
Links to the plates used in this article are included below. These are affiliate links. They don't cost you anything extra, but some may kick a little back to the channel. No obligation to use them, but thanks if you do!
BIQU Website:
Glacier: https://tidd.ly/4xSuhV1
Frostbite: https://tidd.ly/45jdwpC
Amazon
Glacier: https://amzn.to/45iY3WI
Frostbite: https://amzn.to/4g56AS4
Setup on the Bambu Lab H2D
Installing the CryoGrip plates was extremely simple.
The plates include barcodes similar to the ones used by Bambu Lab's own build plates, allowing the H2D to recognize the plate type automatically. The printer recognized the Glacier as a smooth plate and the Frostbite as a textured plate. I created a couple of filament profiles with lower bed temperatures and started printing. One amusing limitation I discovered during testing is that Bambu Lab won't let you set the bed temperature to zero. Apparently, that's where Bambu Lab draws the line between a heated bed and turning your printer into a freezer. I used a setting of 5°C, which was close enough for my testing.
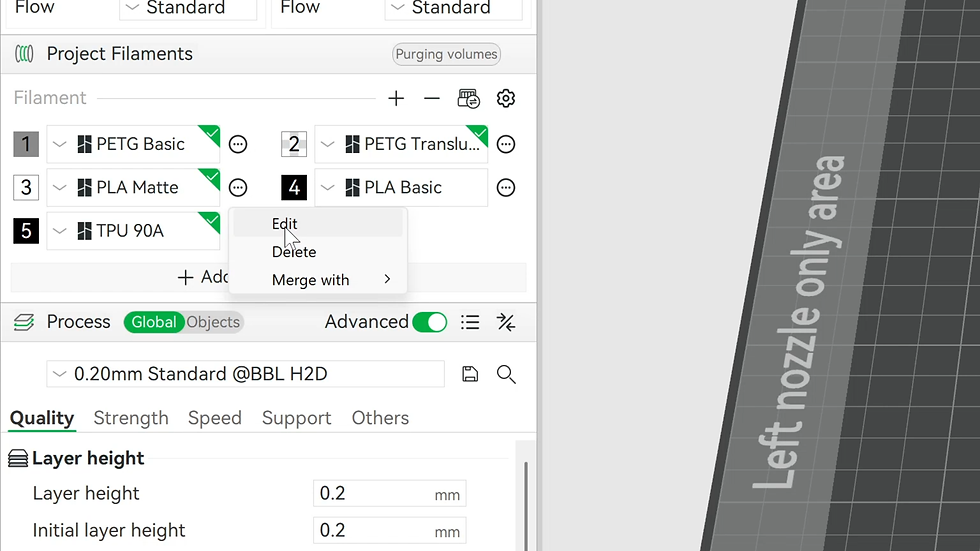
Why Lower Bed Temperatures Matter
Lowering the bed temperature isn't just about saving electricity. For me, the biggest potential advantage is faster prototyping. When I'm designing something, I rarely print the entire project on the first attempt. I'll often print small sections to verify dimensions, fit, or functionality before committing to a larger print. That means I'm constantly doing this:
Print → Remove → Inspect → Modify → Print Again
Anything that reduces the time between those steps makes the design process faster. My stock textured plate has accumulated a few battle scars because I'm not particularly patient about waiting for parts to cool before removing them. The possibility of printing with little or no bed heat immediately caught my attention.
The Surface Finish Was the Biggest Surprise
I expected the CryoGrip plates to impress me with adhesion. I expected some energy savings. What I didn't expect was what I found with surface finish. I've never been a huge fan of the glittery texture that the Bambu Lab textured plate can leave on prints. That's especially noticeable with some of the matte PLA I use for my projects. The CryoGrip Frostbite textured plate produces a different-looking surface that has a much glossier appearance. That can work extremely well with glossy filaments. But the Glacier smooth plate was the real surprise for me. My matte PLA actually stayed matte. Since many of my current projects use matte PLA, I naturally started gravitating toward the Glacier.


Large Print Test: My 3D Printed Shower Shelf
I wanted to give the Glacier plate a difficult test, so I used a project from one of my recent videos: a large 3D printed shower shelf.
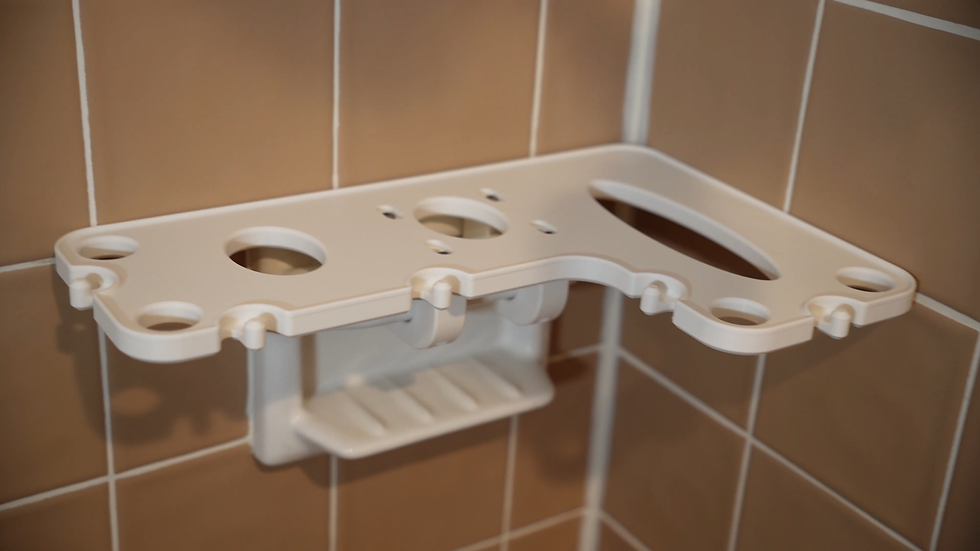
Large prints are a good test for build plate adhesion because they provide plenty of opportunity for corners to lift. I printed the shower shelf at 55°C. The print looked perfect. The real test came when I tried to remove it. It was attached with the confidence of a teenager holding onto a cellphone. Eventually, it released, but it definitely wasn't volunteering. The good news was that I didn't need any tools to remove it, and the print came off successfully without damage. So the first major test was a success. And based on how well it held at 55°C, I suspected I could probably have printed it at a lower temperature.
Printing PLA With the Bed Heat Off
Next, I tested a pile of small prototype parts on the Glacier plate with the bed heat turned off. Every single one printed successfully. And interestingly, the parts were actually easier to remove from the plate when the bed wasn't heated.
For rapid prototyping, this is exactly what I was looking for:
Print. Remove. Repeat.
No waiting for the build plate to cool.
No scraping.
No prying.
Just remove the part and start the next print.

How Much Energy Does a CryoGrip Plate Save?
Of course, lower bed temperatures are only interesting if they actually make a measurable difference in power consumption. So I connected a power meter and compared prints using the Glacier plate at 55°C with prints using little or no bed heat. I tested several projects, including organizer boxes and a set of hexagon shelves. The results were surprisingly good.
The prints made without bed heat showed a little more variation in surface texture, and one small corner lifted on one shelf. But every part was still completely usable. More importantly, the power meter showed that running the printer with the bed heat turned off reduced energy consumption by approximately 60% during these tests. That worked out to roughly 0.2 kWh saved per hour of printing.


If you're running a printer every day or operating multiple printers or a small print farm the savings becomes quite interesting.

The Print That Really Sold Me
The print that ultimately convinced me that the Glacier plate deserved a permanent place in my workflow was a pair of 3D printed PLA sunglasses. This isn't necessarily the easiest print. It has thin contact areas, PETG supports, and some areas that normally require a little tweaking to get right. With the Glacier plate, I didn't use glue. I didn't use any special tricks. The print just worked. The adhesion at 55°C was excellent.

Once the plate cooled, the entire print practically lifted itself off. Even better, the PETG support material separated cleanly from the PLA. And when the print was finished, I had a pretty cool pair of sunglasses. The whole thing felt almost like Elsa was manifesting sunglasses from a glacier.
How Is the Glacier Holding Up?
After several dozen prints, I started seeing a few subtle signs of wear. Most of the damage was self-inflicted. There were a few times when I got impatient and used a pry tool more aggressively than I should have. Despite that abuse, the Glacier has held up extremely well. It's still producing reliable prints, and the surface finish remains one of my favorite things about the plate.
Is the BIQU CryoGrip Glacier Worth It?
I went into this test expecting the main selling point to be energy savings. The lower energy consumption was real, and it's certainly a nice benefit. But it wasn't what made me keep using the Glacier. What surprised me was how often I found myself choosing it because I liked the print finish and reliability. For my Bambu Lab H2D workflow, the Glacier has several advantages:
Excellent first-layer adhesion
Reliable large prints
Easy part removal
Excellent results with matte PLA
Potential for printing with little or no bed heat
Lower energy consumption
Faster prototype turnaround
The Frostbite is still getting more testing, so I'm not ready to declare a winner between the two.
But after dozens of prints, the CryoGrip Glacier has become one of the first build plates I reach for when I start a new project. And that was definitely not what I expected when I started this test.
Final Verdict
If you're looking for a Bambu Lab H2D build plate upgrade, the BIQU CryoGrip Glacier is worth considering especially if you print a lot of PLA and appreciate a smooth, matte surface finish. The ability to run prints at lower bed temperatures is a useful bonus, and for rapid prototyping, being able to remove parts without waiting for the build plate to cool can save more time than the electricity savings alone. For me, the biggest win wasn't the electricity. It was simply finding a build plate that made me think:
"I want to use that one again."
If you're interested in seeing the plates in action, check out the full video on my YouTube channel.
Disclosure: BIQU provided these build plates to me at no cost. They did not require a review, video, or positive opinion. All testing and opinions in this article are my own.


Comments