Multi-Material 3D Printing: Coasters, Project Boxes, and Sunglasses
Multi-material 3D printing opens the door to combining unique material properties in a single print including rigid plastics, flexible seals, soluble supports, and more. In this post, I’ll walk through three projects that highlight what works and doesn’t work when mixing materials on modern multi-material printers like the Bambu Lab H2-series.
Links to Projects in this Article
If you want to print any of these projects yourself, you can find them here:
Drink Coaster
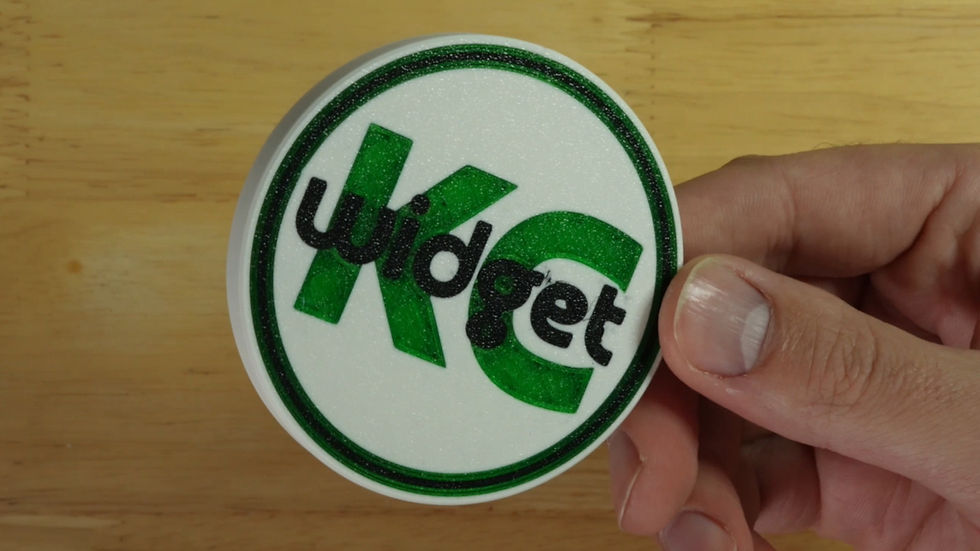
I designed a coaster in PLA Matte with translucent inlaid PETG for the logo colors and TPU feet on the back.
Problems Encountered:
PLA + PETG do not bond well. My first coaster fell apart immediately when I removed it from the print bed.
TPU bonds slightly better to PLA, but still not strong enough to rely on adhesion alone for many applications.

Solutions:
I made the entire back of the coaster PLA so the PETG could only release in one direction.
I printed the coaster face-down to create a natural mechanical interlock since the first layer mashes the filaments together.
TPU feet were left as-is as I determined it was adequate for this application.
These fixes worked, but there’s an even better technique to get PETG and PLA to stick together: Beam Interlocking (more on that below).
Water-Resistant Project Box
This enclosure uses PLA Matte for the body and TPU 90A for the gasket and cable-pass-through sidewalls. The two circles on the bottom are for screws so you can mount the box to another structure.

Problems Encountered:
TPU 68D (TPU for AMS) is too stiff for a reliable water seal. My test box leaked when using it.

Solutions:
Switching to TPU 90A created a tight, leak-free seal.
Channels inside the model helped secure TPU in place since PLA–TPU bonding is weak. I modeled these channels into the box before I knew about beam interlocking (more on that below). If I knew about beam interlocking, I wouldn't have spent all that time modeling the channels to hold the TPU to the PLA.
Why Multi-Material Shines Here
One print produced:
A rigid enclosure
Flexible waterproof gaskets
Cable-sealing TPU ports
No assembly solution, just print and use!
Beam Interlocking: The Secret Weapon
Bambu Studio includes a feature called Beam Interlocking, which automatically creates a cross-hatch pattern between materials that typically won’t adhere.

How to Enable It
Toggle Advanced Mode
Open the Others tab
Scroll to Use Beam Interlocking
The slicer adds mechanical cross-hatched bridges between materials, locking them together without model redesign.
Results
Excellent for PLA/PETG inlays (coasters).
Good for PLA/TPU integration (project box).
Limitations
You can’t yet choose which materials interlock. So when I didn't want PLA going through the screw holes, I didn't have an option to omit it.
Curved Sunglasses with Built-In Hinges
I designed 3D-printed sunglasses using PAHT-CF (nylon carbon fiber) for the frames. They require a significant amount of support because of the geometry.

Problems:
PA Support: Bonds too well and left colored green support material behind.
ABS + ABS Support: Better, but removal was still not perfect leaving some support material behind.
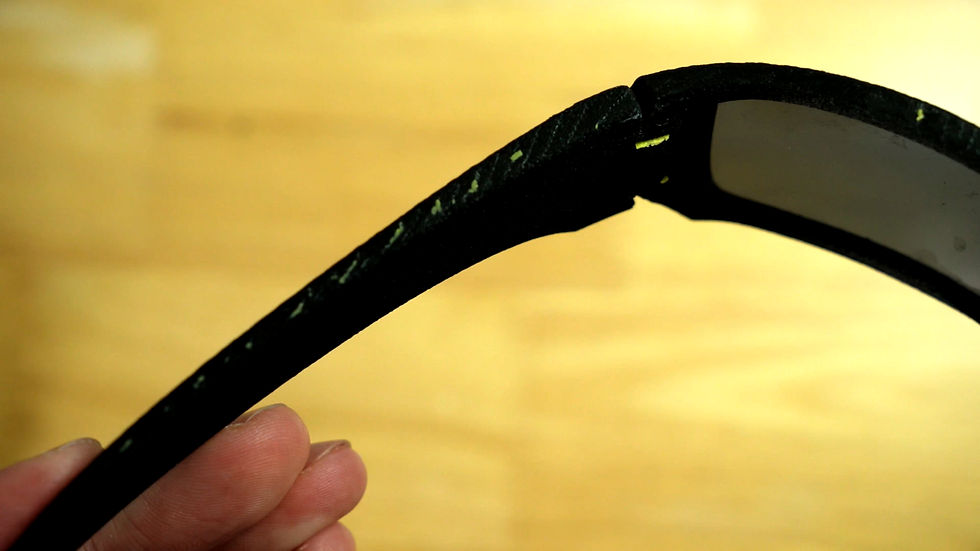

A notes about dedicated support material, it's really only designed to interface a layer or two. There are many reasons for this depending on what support material we are talking about. This means there is still a need for some other material to support the support material. Many folks just use the material they are printing their part with. That can be quite expensive though for some materials.


Solutions:
PAHT-Carbon Fiber frames with ASA supports was a winning combination. The supports came off buttery smooth. ASA prints at similar temperatures to PAHT and is significantly less expensive so it makes perfect sense for supporting PAHT.
ASA supports:
Hold the part firmly during the print
Peel off almost effortlessly
Match the color well enough that any microscopic residue isn’t noticeable
Are far cheaper than wasting PAHT-CF on support structures
This pairing worked better than dedicated nylon support materials I tested.

Final Thoughts
Multi-material printing is powerful but material compatibility matters. Mechanical interlocks, material selection, and the right support materials make all the difference. If you’re getting into multi-material prints, Solutions like Bambu Studio’s Beam Interlocking and the PAHT-CF + ASA support combo are absolutely worth exploring. Also, as we found out, don't expect PLA to bond to much of anything.
More multi-material examples are on the way!


Comments