A Cleaner Wall Mount for the Apolosign Digital Calendar
Our family's digital calendar already came with a perfectly functional wall mount. Naturally, I designed another one.
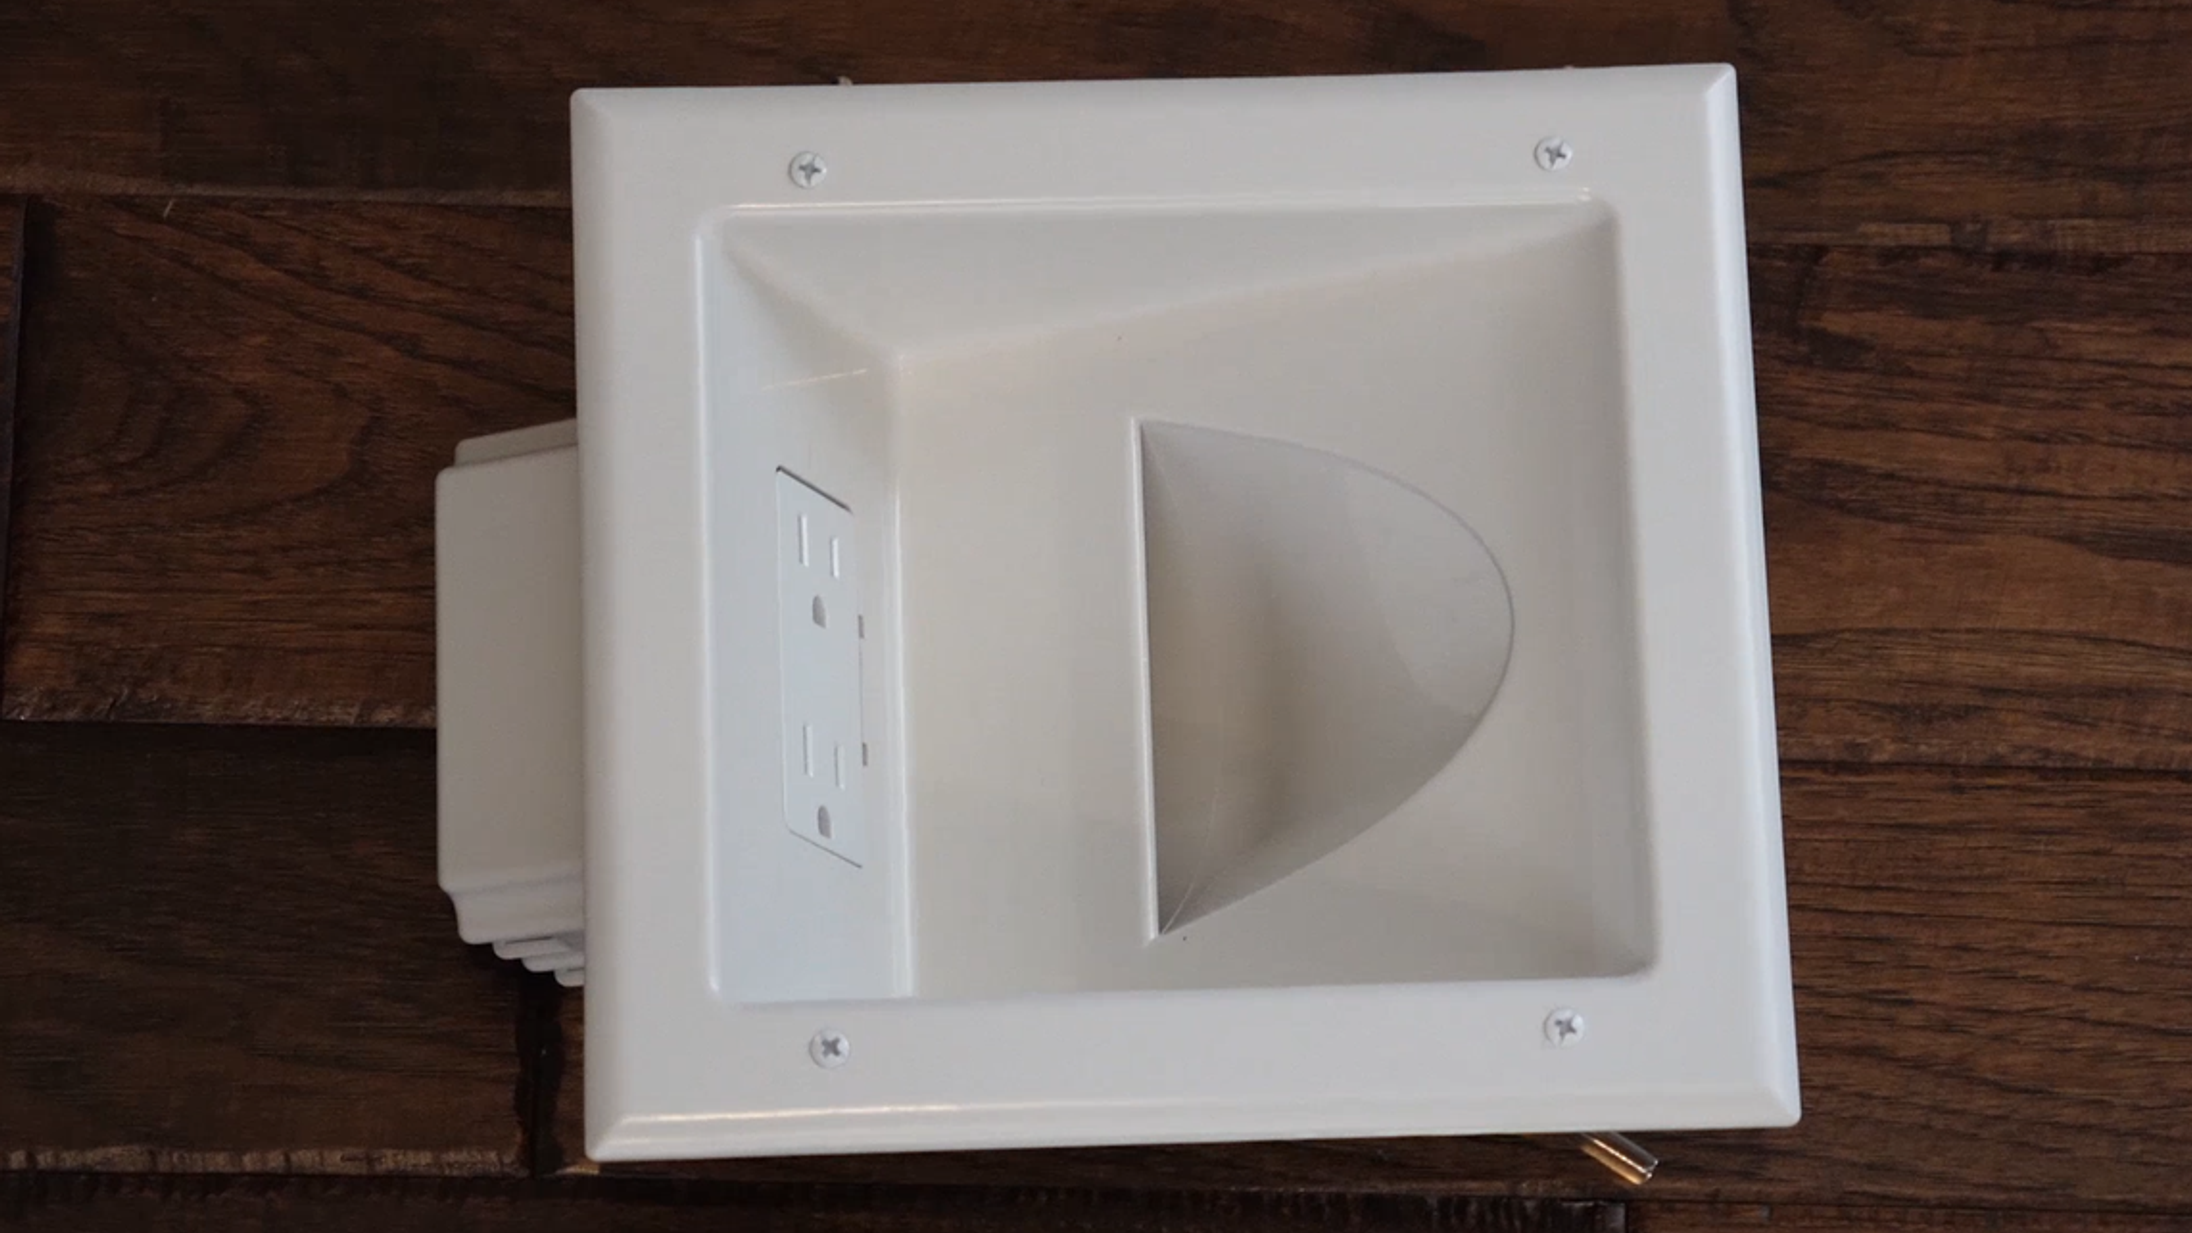
The problem was not that the factory mount was bad. It was that after installing a recessed electrical outlet behind our 21.5-inch Apolosign Digital Calendar, there was a tiny chance that part of the outlet box might still be visible from the side.
Would most people notice? Probably not. Unfortunately, I had already noticed. And I own a 3D printer so here we are.
Summary
I designed and 3D printed a parametric adapter that mounts the original Apolosign Digital Calendar bracket directly over a recessed electrical box, hiding the power adapter, excess cable, outlet, and mounting hardware behind the screen. The result is a clean wall-mounted family calendar with no visible power cable and, more importantly, no tiny piece of electrical box quietly bothering me from across the room.
Watch the Build
The video walks through the Apolosign setup, CAD design, printing, installation, and the extremely minor cosmetic problem that somehow justified an evening of engineering.
Parts
Apolosign Digital Calendar, 21.5-inch version - https://link.amazon/B02VqyFp0
Recessed electrical outlet / recessed electrical box - https://link.amazon/B0gln8pGo
Printed mount adapter - https://makerworld.com/en/models/3289726-apolosign-digital-calendar-recessed-wall-mount#profileId-3732698
Brass M4 heat-set inserts - https://link.amazon/B0fx3h6Nw
M4 Bolts - https://link.amazon/B0ex0QVeT
Tape for covering the unused low-voltage access opening
Note: Some of these are affiliate links which means they don't change your checkout flow or price but they do help support the channel. Don't feel obligated to use them, but thank you if you do!
Tools
3D printer
Measuring tools
Drill and drill bits (various sizes)
Soldering iron or similar for installing brass heat-set inserts
Skills Exercised
This project is a good introduction to several useful maker and engineering skills:
3D CAD modeling: Designing an adapter around existing hardware and physical constraints.
Parametric modeling: Creating adjustable dimensions so the design can be adapted to similar installations.
3D printing: Producing functional parts with accurate mounting geometry.
Heat-set insert installation: Adding durable threaded mounting points to a printed component.
Basic mechanical assembly: Integrating printed parts, factory hardware, fasteners, and an existing wall box.
The project is a good example of building something not because the original product is broken, but because designing the missing piece is a useful way to learn.
Why We Use an Apolosign Digital Calendar
Before making the installation more complicated, it is probably worth explaining why I wanted the calendar permanently mounted in our living room in the first place. We use an Apolosign Digital Calendar, specifically the 21.5-inch version. It can be mounted vertically or horizontally and works as both a family calendar and a digital photo frame.
One of the features that originally sold me on it was that it has two different operating modes.
Calendar Mode gives you Apolosign's built-in calendar and family-organizer features.
System Mode essentially turns the display into a very large Android tablet.

That system mode is especially useful for our family because we already use a few Android apps for things like school and sports. Instead of being limited entirely to the software built into the calendar, we can install some of the apps we already use.
It can also display regular web pages. That gives us a browser in the living room, which sounds slightly dangerous until you remember that the browser is attached to the wall. It is convenient enough for somebody to walk over and quickly look something up, but inconvenient enough that nobody really wants to stand there browsing for an hour.
Including the adults like me. When nobody is actively using it, it goes back to showing our family calendar and photos, occasionally reminding us that our children used to be much smaller. That made the living room a useful permanent home for it.
The Normal Installation
Apolosign already includes what you need to wall mount the calendar. For most people, the process is basically:
Attach the supplied bracket to the wall.
Attach the calendar magnetically.
Plug it in.
That is a completely reasonable installation procedure.
But if I am permanently mounting a screen to the wall, I do not really want a power cable hanging below it. Or beside it. Or, ideally, existing anywhere that I can see it.

So I had a recessed electrical outlet installed behind the calendar. The recess gives the power adapter and excess cable somewhere to live behind the screen instead of hanging down the wall. Problem solved. Mostly.
The Extremely Minor Problem
I could have mounted the original Apolosign bracket beside the recessed outlet. The screen would have covered most of the electrical box, everything would have worked properly, and depending on your viewing angle, you might have been able to see a tiny part of the recess from the side. Or you might not.

This installation would have been completely acceptable. But I knew I could make it slightly more acceptable. That is rarely a useful thought when there is a 3D printer nearby.
Designing the Apolosign Mount Adapter
The design requirements were simple. I wanted to mount the original Apolosign bracket directly over the recessed electrical box while keeping the entire assembly hidden behind the calendar. The printed part did not need to replace the Apolosign mounting system. In fact, I specifically wanted the original bracket to continue doing the actual calendar-holding duties. My adapter just needed to give that bracket a better place to live. I measured the recessed electrical box and the mounting points on the Apolosign bracket, then designed an adapter that would fit inside the recessed box.
The design had to accomplish a few things:
Position the original Apolosign bracket correctly.
Leave room for the electrical outlet.
Leave space for the power adapter.
Provide room for excess cable.
Keep the entire assembly behind the calendar.
Remain accessible enough to assemble without inventing new vocabulary.
The resulting CAD model is not particularly complicated. Which is part of why I like projects like this. The interesting part is not necessarily the printed object itself. It is being able to create one very specific part that makes an existing product work exactly the way I want it to in our house.

Printing the Adapter
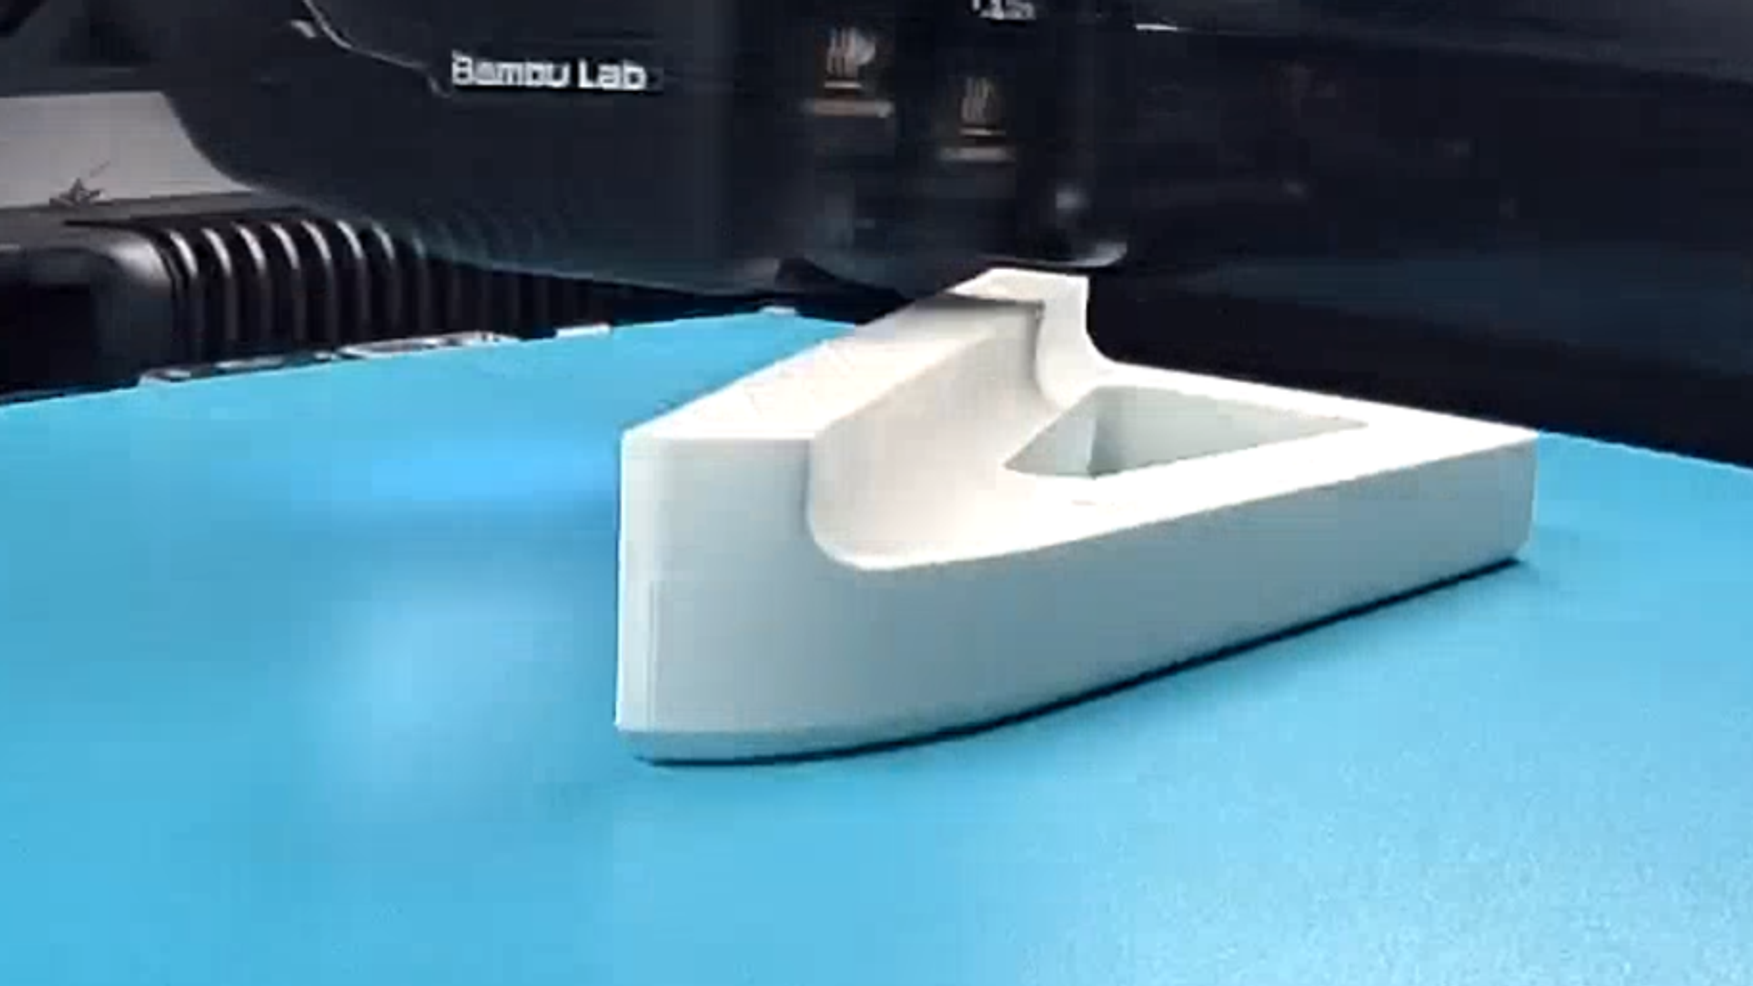
Once the design was finished, I sent the parts to my Bambu H2D. This is exactly the kind of job that makes having a 3D printer worthwhile for me. Yes, I could probably fabricate something similar from wood. I could make it from metal. I could spend an unreasonable amount of time wandering through a hardware store holding various brackets next to one another. Instead, I can design the exact geometry I need, print it with very little mess, and make the same files available for somebody else to use. That last part is especially useful here because the model is parametric. More on that later.
Installing the Printed Mount
There is one important detail about the order of installation. The electrical outlet attaches to the back of the recessed box, and four clamps secure that box to the wall when its screws are tightened. Because of that, the printed brackets need to be installed before the recessed electrical box goes into the wall. With the box accessible, I positioned the printed brackets, marked the mounting holes, and drilled them. During my first attempt, one of the holes ended up slightly too close to the structure of the electrical box. That is what we in engineering call version one. The model I am providing has already been corrected. You get version two. This arrangement is much more efficient for everyone.


M4 Hardware and Heat-Set Inserts
I use M4 hardware for a lot of my 3D printed projects. It is large enough to provide useful strength without being unnecessarily bulky, and using the same general hardware size across multiple projects means I do not have to operate a small hardware store in my basement. For the four mounting points that attach the original Apolosign bracket to the printed adapter, I used brass heat-set inserts. There are plenty of printed projects where I consider heat-set inserts optional. This was not one of them. There is a 21.5-inch screen hanging on the wall. I am willing to spend the extra few minutes.

Once the inserts were installed, the recessed electrical box could be installed normally. The original Apolosign bracket then attaches to the printed adapter using four M4x8 screws. So the factory bracket is still performing the job it was designed to do. The printed adapter simply positions it where I want it.
A Small Spider-Related Design Improvement
I also put a little tape over the low-voltage access opening in the recessed box. Part of that is to reduce drafts. Part of it is because of spiders. I am generally comfortable sharing the house with spiders. I am less comfortable providing them with dedicated infrastructure. With that opening covered, the power adapter still plugs in normally and the extra cable stays neatly inside the recess.

The Finished Installation
Once everything was assembled, the calendar simply attached to its original magnetic bracket.
And that was it.
The screen completely covers the recessed electrical outlet. The power adapter and excess cable are hidden behind it. There is no visible power cable running down the wall. And when you look at the calendar from the side, there is no electrical box peeking out from behind the screen. Again, this was not exactly a crisis. But now it is gone.

Why I Like This Kind of 3D Printing Project
This is one of my favorite categories of 3D printing project precisely because the printed object itself is not especially exciting. It is a bracket. It took an evening. Nobody is going to put it in a museum. But it allowed me to take a product our family already likes and make it fit our home exactly the way I wanted. The Apolosign still works exactly as intended. The original mounting bracket is still being used. The recessed outlet still handles the power. The only real difference is that all of those pieces now fit together a little more cleanly. And I no longer have to look at a tiny piece of outlet box that almost certainly would not have bothered anyone else. This is generally how progress happens.
Free Parametric 3D Printable Files
I am making the printable files for this adapter available.
3D Model Download: https://makerworld.com/en/models/3289726-apolosign-digital-calendar-recessed-wall-mount#profileId-3732698
The model is parametric, which sounds much more intimidating than it actually is. In this case, it simply means I set up several important dimensions that can be changed without redesigning the entire model from scratch. So if your recessed electrical box or Apolosign mounting points are slightly different from mine, you can adjust the relevant measurements and generate a version that fits your setup. If you have exactly the same hardware I used, you can simply print my version. I have already spent the evening on your behalf.

If you want to see how to adjust the model, check out my video here:
Warnings and Cautions
Electrical Work
If you are installing or relocating an electrical outlet, follow all applicable local electrical requirements. Use a qualified electrician where required or appropriate. The 3D printed adapter is the DIY portion of this project. Please do not experiment with your home's electrical wiring.
Wall-Mounted Equipment
This installation supports a 21.5-inch display. Make sure the printed parts, inserts, fasteners, electrical box, and factory mounting bracket are properly installed and secure before attaching the calendar.
Final Thoughts
The Apolosign already had a wall mount. The recessed outlet already hid the cable. I could have stopped there. But now the entire installation disappears neatly behind the calendar, the factory bracket still does its job, and there is no tiny sliver of electrical box visible from the side. It is slightly more acceptable. Which is sometimes more than enough reason to spend an evening designing a bracket. If you build one of these, modify the parametric model for a different recessed box, or come up with an even more unnecessarily specific improvement, leave a comment. I would love to see what you changed, and I am happy to answer questions about the design or installation.


Comments