
Fall might be my favorite time of year for 3D printing. It gives me an excuse to make things like a giant Halloween vampire teeth candy bowl, a personalized coffee cup holder for Grandma, and an interchangeable fall lantern that somehow turned into a clock.
All three projects were designed in Autodesk Fusion and printed on my Bambu Lab H2D, but none of them require an H2D specifically. As long as your printer has enough build volume, you can make them on other 3D printers too. Multi-material capability is only needed if you want the color inlays.
A Slightly Larger Set of Vampire Teeth
When I was a kid, becoming a vampire for Halloween required very little planning. A black cape and a cheap set of plastic vampire teeth handled most of the transformation.
A coworker suggested turning those teeth into a candy bowl.
So I did.
The basic idea was to take the familiar plastic teeth and make them much less practical to put in your mouth. I started by measuring the original. The exact scale wasn't especially important, but the original already had the shape and proportions I wanted.
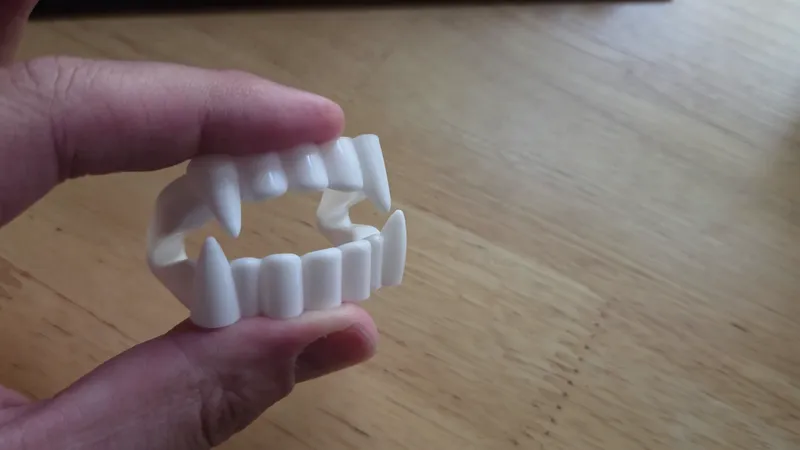
The lower jaw was straightforward. I filled in the bottom enough to turn it into a functional bowl while preserving the recognizable outline of the teeth.
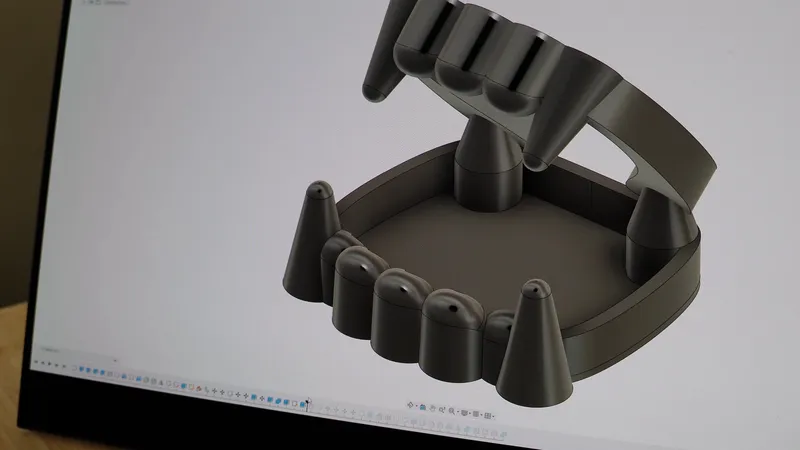
The upper jaw required a little more thought. Printing the entire thing as one piece would have required a large amount of support material, most of which would end up as trash. Making the upper teeth separately reduced that waste and also created two ways to use the finished print.
Leave the upper jaw off, and it works as an open-mouth candy bowl. Install it, and the model gets the full retro vampire-teeth look.
I added printed ribs to hold the jaws open. Those can also be glued into place if you want to make sure the upper jaw doesn't unexpectedly snap down while someone is reaching for candy.
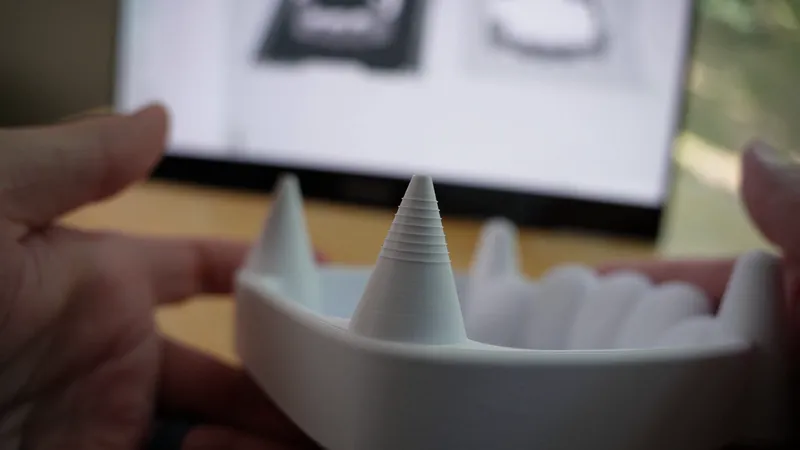
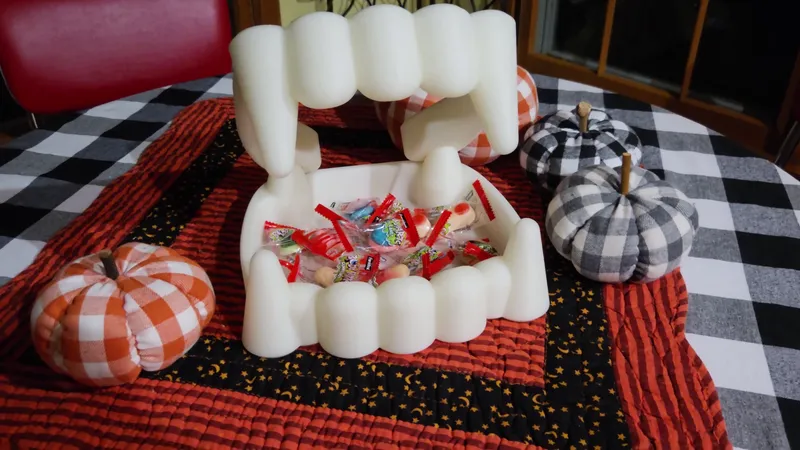
Glow-in-the-dark filament was an easy choice for the teeth. This is Halloween, after all.
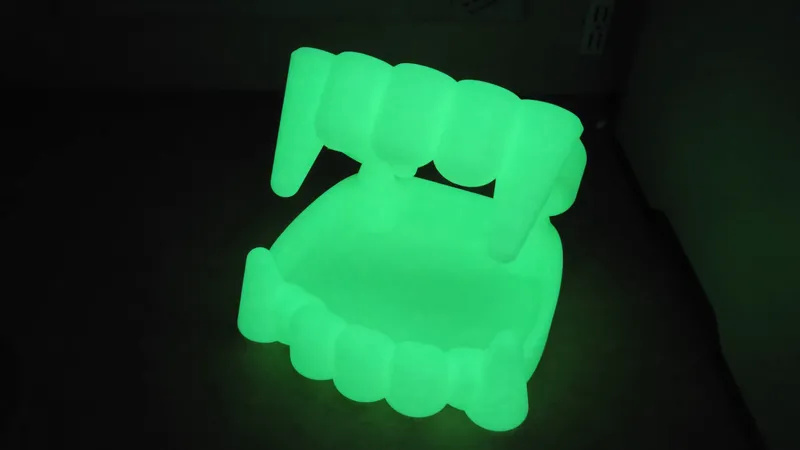
A large-format printer is useful here if you want an excessive candy capacity, but the model can also be scaled to fit a smaller printer or a more restrained quantity of candy.
A Better Handle on Hot Drinks
One of my favorite things about owning a 3D printer is being able to make something for no reason beyond amusement.
Occasionally, however, it's useful to produce evidence that the printer can solve actual problems.
My grandma's new place has coffee available, along with the usual assortment of hot drinks that become more appealing in the fall. The drinks come in disposable cups, and those cups have a few shortcomings. They get hot to hold, they have no handles, and their narrow bottoms make them easier to tip over than I'd like.
So I designed a holder around them.
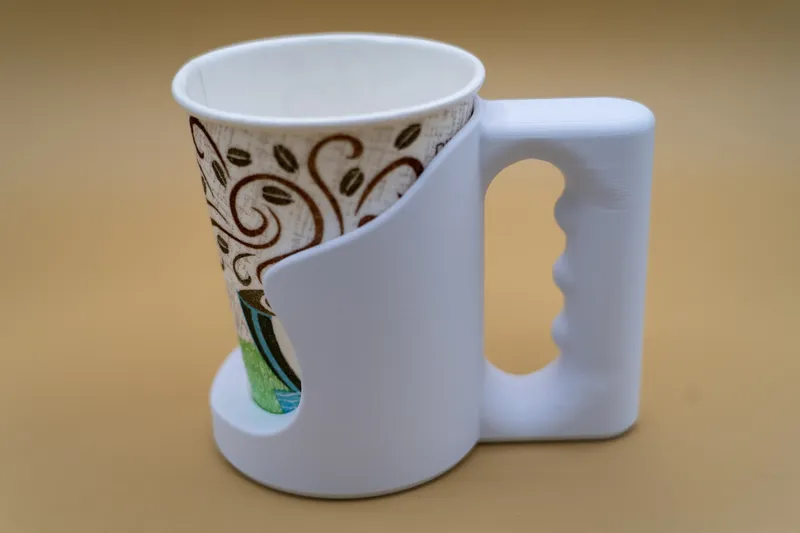
The holder mostly surrounds the disposable cup, which helps keep the hot surface away from your hands. It also adds a comfortable handle and a much wider base for stability.
The holder remains open enough that the disposable cup can easily be pulled out and replaced.
Since I was making this specifically for Grandma, leaving it generic seemed like a missed opportunity. Her favorite animal is an owl, so I added one to the design.
That personalization also led to a version that can be customized without going back into the original CAD model.
Customizing the Holder in Bambu Studio
The basic coffee cup holder can be imported directly into Bambu Studio and decorated using the color painting tools.
Select the model, open the color painting tool, choose the filament you want to paint with, and draw directly onto the surface. For example, I added a simple leaf to one side and repeated it on the other to keep the design symmetrical.
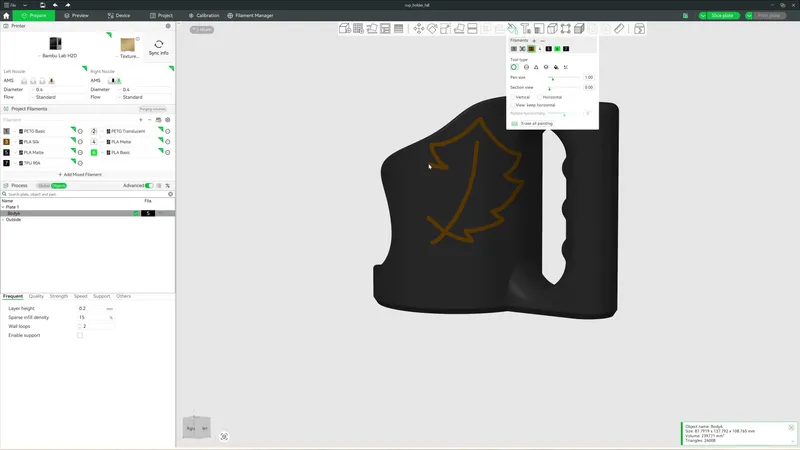
Once the artwork is finished, slice the plate and print it as usual.
The important difference is that these decorations aren't separate pieces glued onto the finished holder. They're incorporated as inlays in the print itself.
That makes the same base model work for personalized designs, seasonal patterns, names, or whatever else you can reasonably draw with Bambu Studio's painting tools.
A Lantern That Changes With the Seasons
The third project started with our fall mantel.
My wife decorates it nicely each year, and I wanted to contribute something that could fit into the display. I decided on a lantern.
The question was whether it would remain on the mantel or quietly disappear when I wasn't paying attention.
Rather than making the entire lantern specific to fall, I designed it around interchangeable panels. The frame stays in place while the decorative panels swap out.
Halloween panels can become fall panels, which can eventually become Christmas panels or whatever else I decide the lantern needs.
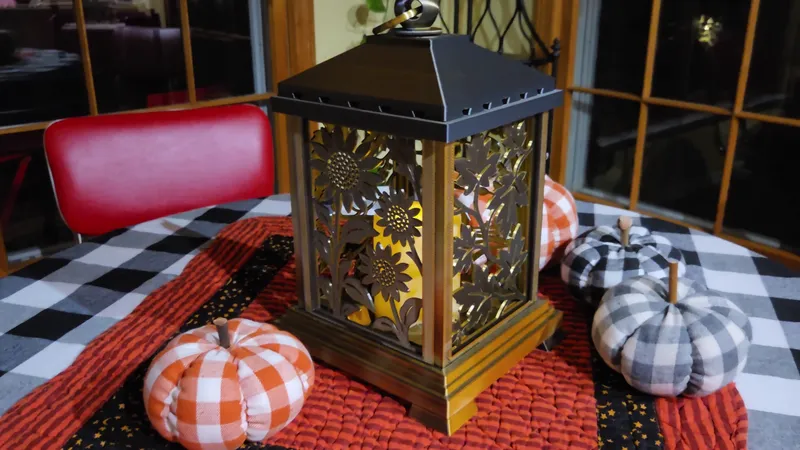
The openings are plain 5-by-7-inch rectangles. That choice makes the lantern far more flexible because there's no requirement to use my printed panels.
You could use:
- Acrylic
- A photograph
- Glass from a photo frame
- Laser-cut panels
- Other 5-by-7-inch materials or designs
A laser-equipped machine such as the Bambu Lab H2D Laser could also be used to create custom inserts from other materials.
Making Interchangeable Panels Stay Put
Swappable panels introduced a small mechanical problem. They needed to come out easily when I wanted to change them, while remaining secure enough that they wouldn't fall out on their own.
At one point, I designed a fairly elaborate rotating mechanism.
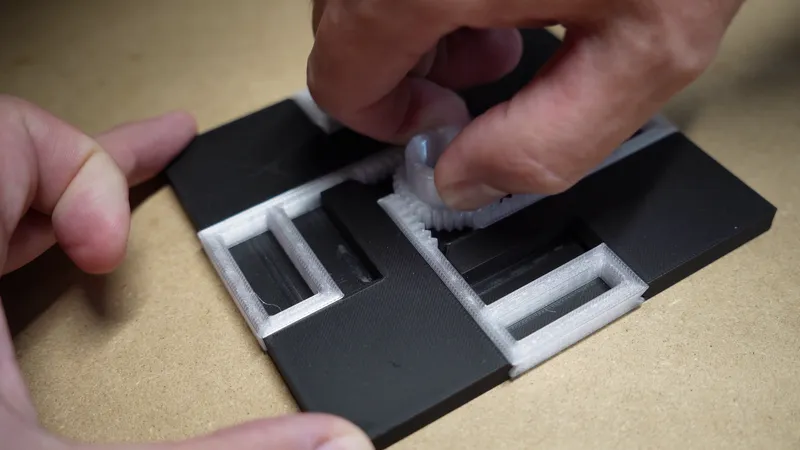
After I'd spent plenty of time on that, the simpler solution won.
The final version uses a sliding lock and friction to hold everything together. Getting the fit right took several iterations and test prints, but the mechanism itself is intentionally basic.
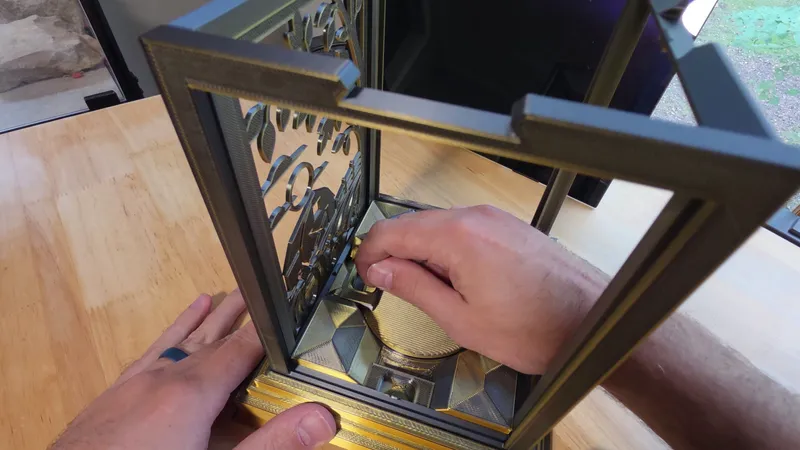
The Lantern Acquires a Job
At this point, I had a functional lantern. That should have been enough.
Instead, I started wondering whether something occupying shelf space for several months could do more than provide seasonal illumination.
So I made a clock face.
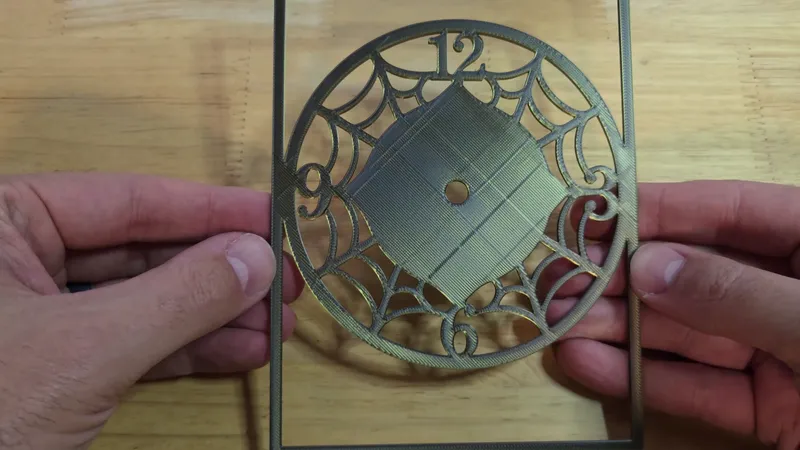
The lantern can still be built purely as a decorative light. Add the clock face and a timepiece, however, and it becomes a functional clock while retaining the same interchangeable-panel system.
For lighting, a battery-powered LED pillar candle works. I used one with a built-in timer that stays on for six hours and then turns off for 18 hours. That lets the lantern turn itself on each evening without requiring much attention.
Caution: The lantern is 3D-printed plastic. Do not use a real candle, open flame, or another light source that produces significant heat. Use a cool-running battery-powered light suitable for use around plastic.
Test Small Before Printing Big
All three projects required getting physical fits right, and that meant test prints.
Instead of printing an entire part after every adjustment, I isolated the important section and printed just enough geometry to check the fit.
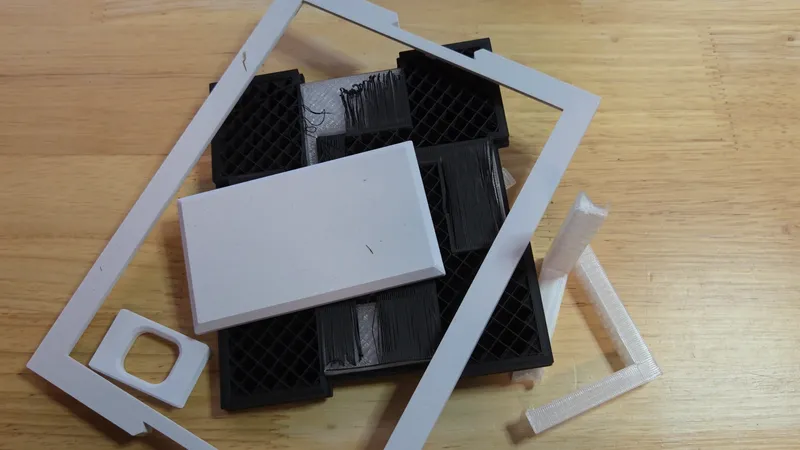
This technique helps whenever a large print depends on a critical dimension. If a sliding lock, mating surface, cup diameter, or other interface needs adjustment, printing a small cross-section can provide the same information without committing to the full model. That saves filament and, more importantly, time.
There is one side effect: you end up with a lot of tiny plastic scraps.
Giving the Scraps Somewhere to Go
For reasons that are difficult to defend, my test pieces and filament scraps tend to collect at the bottom of the printer despite the existence of a perfectly functional trash can nearby.
BIQU provided me with a product called the Panda Diaper to address that problem.
It sits at the bottom of the printer and gives those scraps somewhere intentional to collect. When it's time to clean the printer, the accumulated pieces are much easier to remove. I just have to pull the diaper out, dump the plastic in the waste bin and put the diaper back.
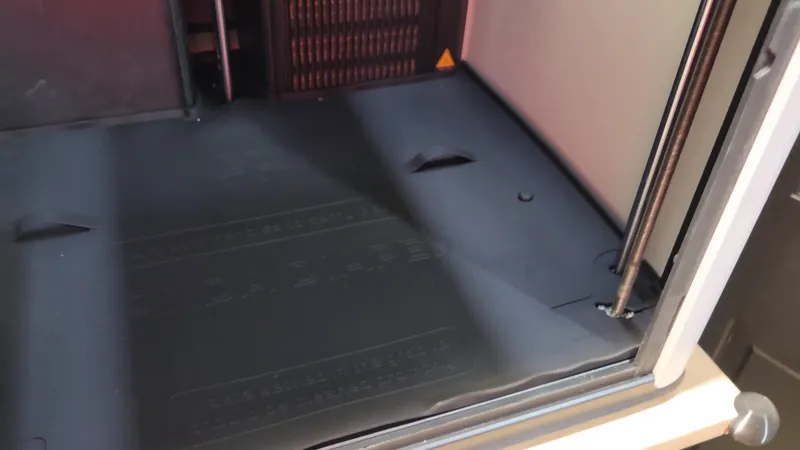
It's a basic accessory, but it makes cleaning easier and gives the bottom of the printer a more finished appearance.
Thank you to BIQU for providing it.
Three Projects, Three Reasons to Print
These projects ended up covering three very different reasons I enjoy 3D printing.
The vampire teeth exist mostly because they make me smile. The coffee cup holder solves a real problem and can be personalized for whoever is using it. The lantern started as seasonal decoration and became a reusable platform for different panels, materials, holidays, and even a clock.
There are plenty of candy bowls, cup holders, and lanterns available to buy.
The interesting part is that none of them would be quite like these.
And with more seasonal panels to design for the lantern, at least one of these fall projects has already found a reason to keep the printer running well beyond fall.