
The idea behind the Interchangeable Seasonal Lantern is straightforward: print the main structure once, then change the decorative panels whenever you want a different look. The base, side frames, top, and canopy fit together with sliding and snap-fit connections, so there's no glue or hardware in the main assembly. This guide covers the printed parts, the optional upgrades, and the assembly steps.
A Lantern Built for Changing Seasons
The original design includes four fall-themed panels, but the system makes it easy to mix and match. Additional panels, including Halloween decorations and clock faces, are available on the lantern download page.
There are also several optional upgrades:
- Thin acrylic inserts for color and light diffusion
- Battery-powered LED lighting
- A quartz clock mechanism
- Four printed feet for the bottom of the lantern
None of these are required for the basic assembly. You can keep the lantern simple or customize it for a particular display.
What to Print
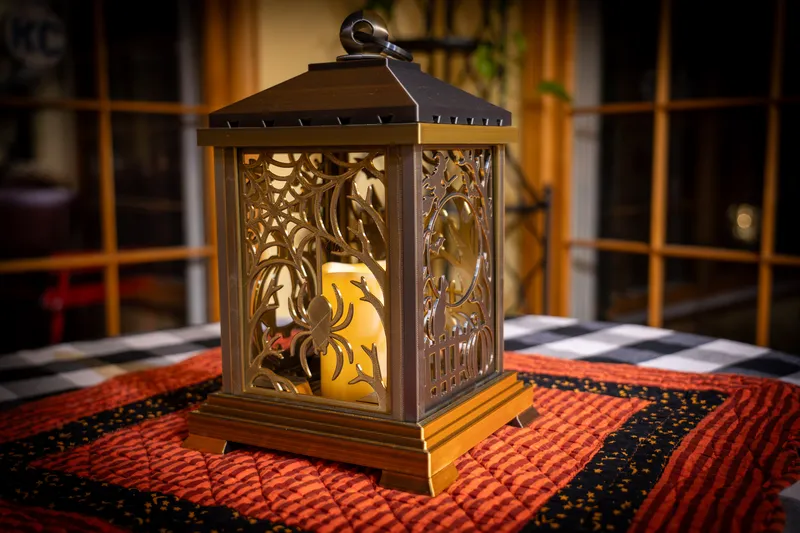
Before starting assembly, make sure all the printed components are ready. The main lantern requires:
- One base
- Four side frames
- Four decorative panels of your choice
- Eight locking sliders
- One flat top piece
- One canopy
- One threaded ring assembly
- One access plug for the bottom opening
There are also four optional feet that attach to the underside of the base.
Of the eight locking sliders, four secure the side frames to the base and the remaining four connect the frames to the flat top. The decorative panels are separate from the structural parts, so you can print several seasonal sets without another base, canopy, or set of frames.
Optional Acrylic Inserts
One of the easiest ways to change the appearance of the lantern is to place thin acrylic sheets behind the decorative panels. The acrylic gives the openings a glass-like appearance and lets you introduce different variations without printing additional panels.
The panel openings are 5 by 7 inches, a standard photo size, so pre-cut acrylic or glass from a photo frame will fit. If you're cutting your own, I use 0.040-inch acrylic, which is approximately 1 mm thick. It's thin enough to score and snap by hand while remaining rigid enough to work as a panel insert. Acrylic sheets are available in clear, translucent, and colored varieties at hobby stores and online.
Cutting the Acrylic
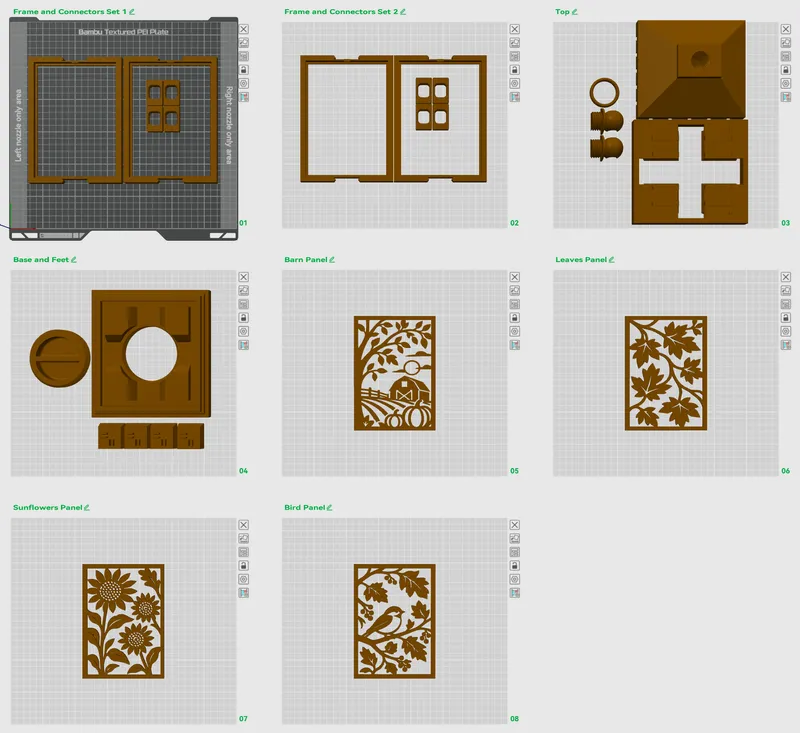
For thin acrylic and straight cuts, a scoring method works well.
- Measure the insert against the decorative panel.
- Place the acrylic on a stable work surface.
- Position a straightedge along the intended cut.
- Use a sharp utility knife or acrylic scoring tool to score the same line several times.
- Align the scored line with the edge of a workbench.
- Carefully snap the sheet along the score.
You don't need to cut completely through the acrylic. The score creates a controlled break line. Wear safety glasses, keep your fingers away from the blade, and support the material securely while cutting.
This technique is intended for thin acrylic and straight cuts. Thicker sheets, curved cuts, and other plastics such as polycarbonate generally require different cutting methods.
Using Protective Film for Diffusion
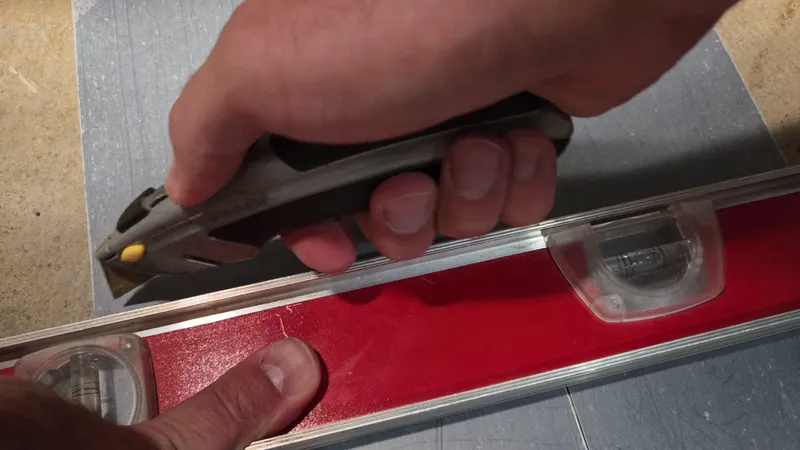
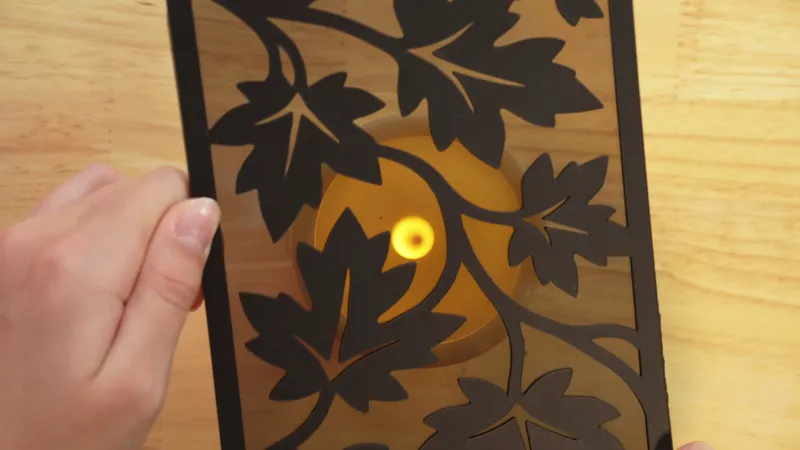
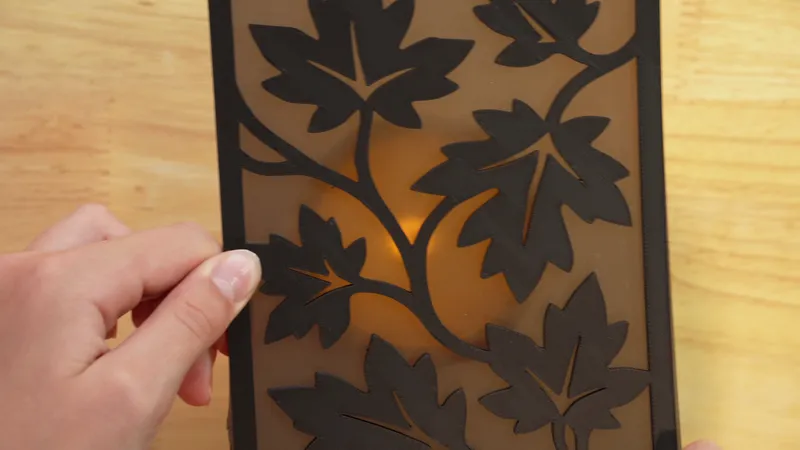
Some acrylic sheets arrive with protective film on one or both sides. Depending on the film, leaving it attached can produce a frosted or smoky appearance that helps diffuse light from inside the lantern.
Try holding a sample in front of your chosen LED light before removing the film. The difference can be noticeable, especially with clear acrylic.
The film isn't designed as a permanent diffuser, so its appearance and durability will depend on the material. For a more permanent effect, frosted acrylic is another option. Below are some insert examples for comparison.
Choosing the Lighting
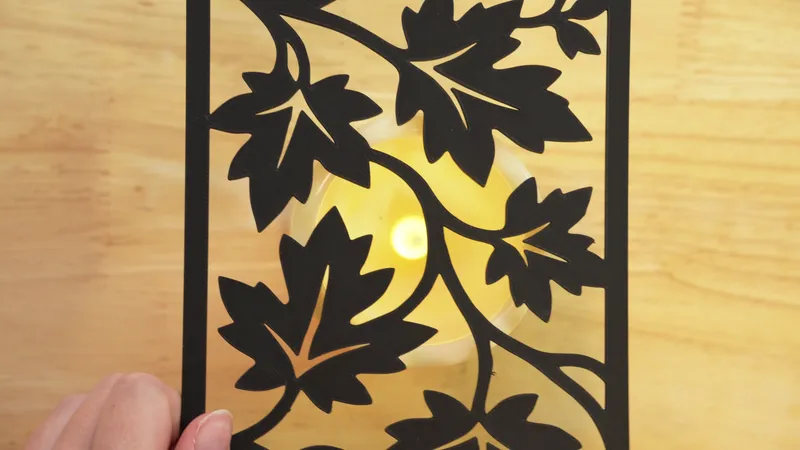
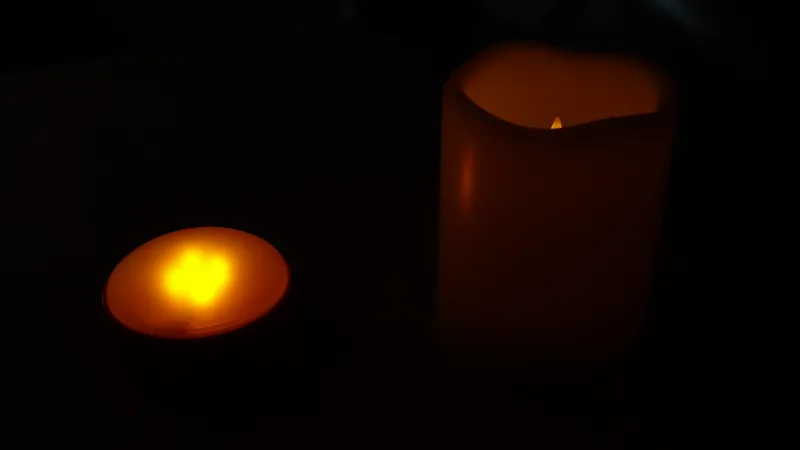
Lighting is technically optional. You could leave the lantern unlit and use it as a four-sided decorative display. But since it's a lantern, putting a light inside seems like a reasonable next step. I've tried two battery-powered options, and both work well.
Battery-Powered LED Pillar Candle
The first option is a battery-powered LED pillar candle with a built-in timer. The one I use runs a repeating schedule: six hours on, eighteen hours off. Once activated, it turns itself on and off each day on its own.
Its softer illumination gives the lantern a traditional candle-like appearance. Battery life is also good, although this option isn't particularly bright. For a decorative lantern with relatively light-colored panels, it's a good choice.
Battery-Powered Remote-Control LED Light
The second option is a brighter puck-style LED light with a remote. It works particularly well when you're using darker acrylic inserts or anything else that needs more illumination. The one I've used includes a remote control, adjustable brightness, and timer and on/off functions.
The brightness adjustment is useful when experimenting with different panel materials. You can increase the output for darker inserts or reduce it when a softer glow is preferred.
I generally prefer the appearance of the pillar candle, partly because it looks more like a candle and partly because I don't need another remote control. The better choice depends on the panel design and the lighting effect you want.
A note about fire safety: Use battery-powered LED lighting only. Do not place a real candle or any open flame inside the lantern. The printed plastic components aren't designed to withstand direct flame or the heat produced by a burning candle. The same caution applies to other heat-producing light sources. Use low-heat LED lights that are appropriate for an enclosed decorative display.
Adding an Optional Clock
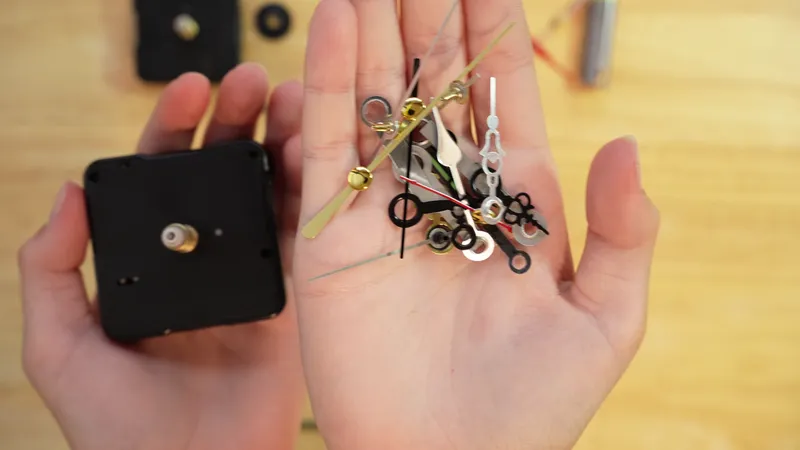
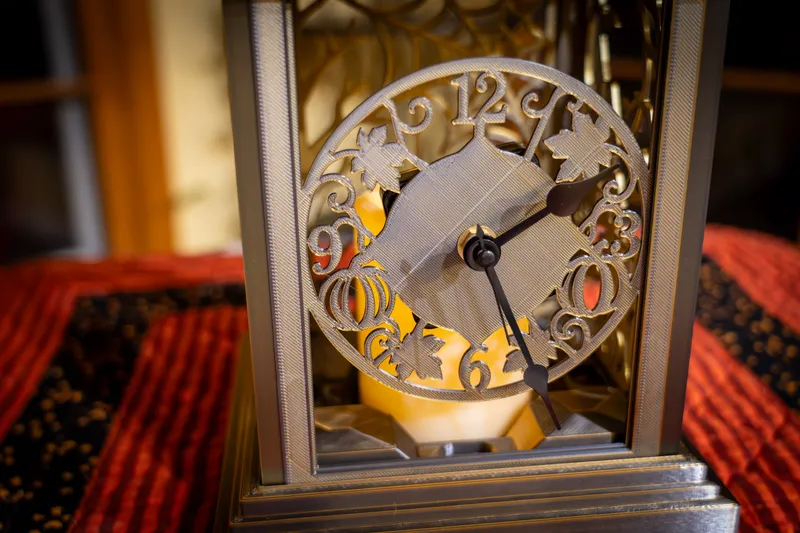
One of the available panel variations includes a clock face. A small quartz clock mechanism mounted directly to the printed panel turns your lantern in to a clock.
I use a quartz mechanism kit with relatively small hands that fit within the clock panel. The kit I bought includes multiple mechanisms, which is convenient if you're making several clocks.
Installing the Clock Mechanism
It's easiest to install the clock before inserting the panel into its side frame.
- Place the rubber gasket onto the clock mechanism. This helps prevent the mechanism from rotating after installation.
- Insert the mechanism's shaft through the back of the printed clock face.
- From the front, install the washer and retaining nut.
- Tighten the nut enough to hold the mechanism securely without deforming the printed panel.
- Press the hour hand onto the shaft.
- Install the minute hand, followed by the second hand.
- Check that all three hands are parallel and have sufficient clearance.
- Set the time and install the battery.
The hands should move freely without contacting one another or the printed clock face. Avoid overtightening the retaining nut; the mechanism only needs to be held firmly enough that it doesn't rotate during normal use.
Assembling the Lantern
With the optional inserts and clock prepared, the main assembly is fairly straightforward.
Step 1: Install the Optional Feet
Start with the base on your work surface. If you're using the four optional printed feet, turn the base over, press each foot into its mounting point, and make sure they're seated. Then turn the base upright.
Step 2: Prepare the Decorative Panels
Slide each decorative panel into its side frame. If you're using acrylic inserts, place the acrylic behind the decorative panel as you assemble the frame, so the printed panel faces the outside of the lantern and the acrylic sits behind it on the inside. You can also leave the decorative panel out entirely if you prefer an open-sided appearance.
Repeat this process for all four frames.

Step 3: Attach the Side Frames to the Base
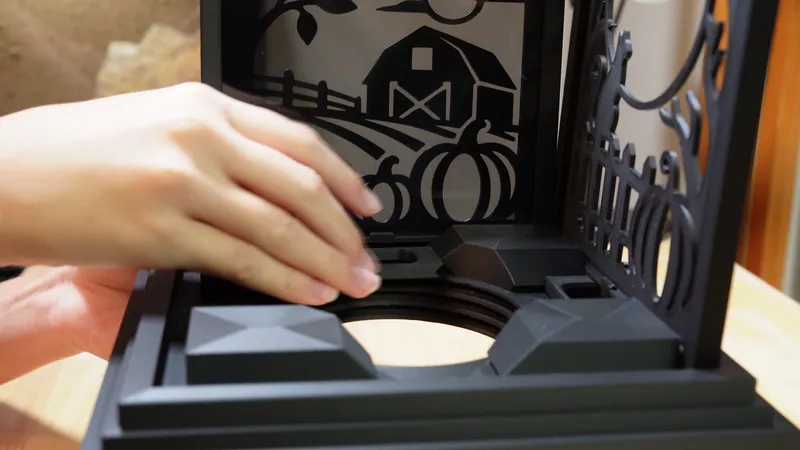
Place the first prepared side frame into its mounting position on the base and check that it's seated properly. Take one locking slider and slide it into the corresponding connection to secure the frame. Repeat for the remaining three sides.
Each side frame uses one locking slider at the bottom, for a total of four. The sliders provide the mechanical connection between the frames and the base, and they make it possible to disassemble the lantern later without tools.
Step 4: Prepare and Install the Flat Top
Depending on your printer and slicer settings, the flat top piece may require support material during printing. When printing the top in PLA, I like using PETG as the support interface material. The two materials separate well, making the supported surfaces easier to clean up.
Before assembly, inspect the underside of the top and remove any remaining support material. Leftover support can interfere with the fit between the top and the side frames.
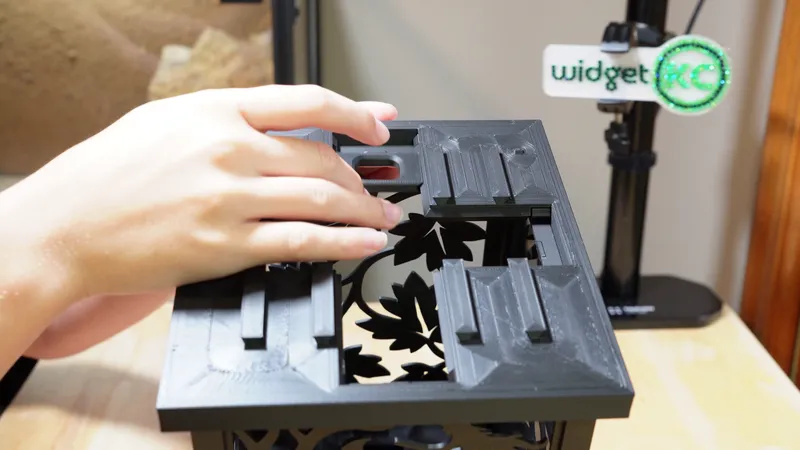
Once the part is clean, position it over the four assembled frames and press it into place. Use the remaining four locking sliders to secure the top. At this stage, the main rectangular body of the lantern should be assembled.
Step 5: Assemble the Canopy and Threaded Ring
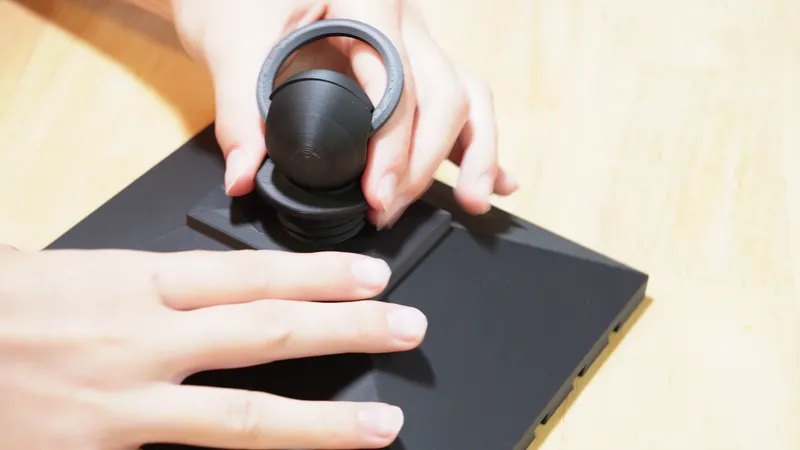
The canopy is the decorative upper section of the lantern. Before installing it, screw the threaded ring assembly clockwise into the canopy until it's seated.
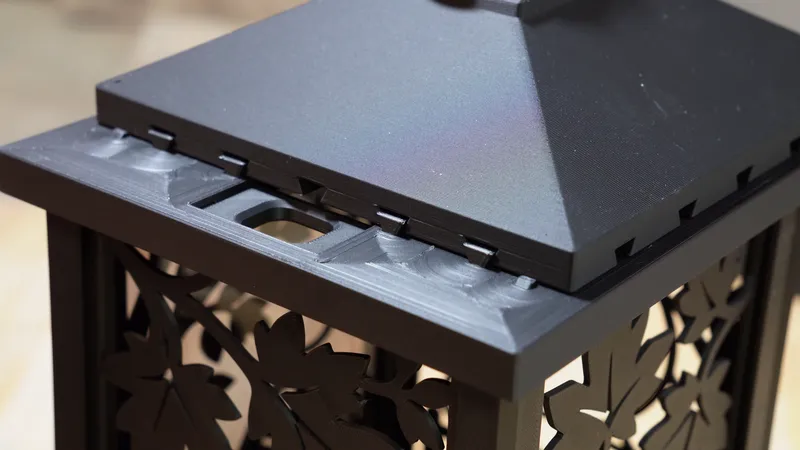
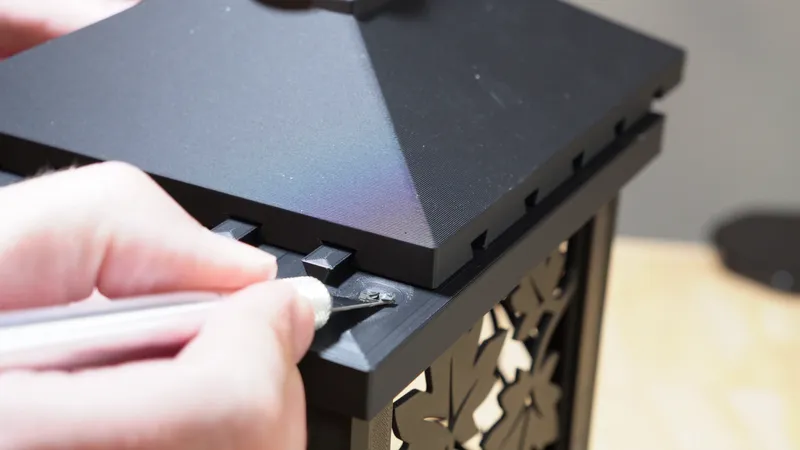
Next, look at the raised protrusions on the flat top piece. These engage with corresponding ridges underneath the canopy to hold it in position. Place the canopy onto the lantern and slide it toward the protrusions until it snaps into the locked position.
The protrusions are intentionally a little oversized to create a firm connection. Depending on printer calibration, material, and dimensional accuracy, the fit may be tighter than expected. If the canopy is very hard to install, carefully remove a small amount of material from the interfering features using fine sandpaper or a hobby knife. Make small adjustments and test the fit frequently. Removing too much material can weaken the connection and make the canopy loose.
Step 6: Install the Light and Access Plug
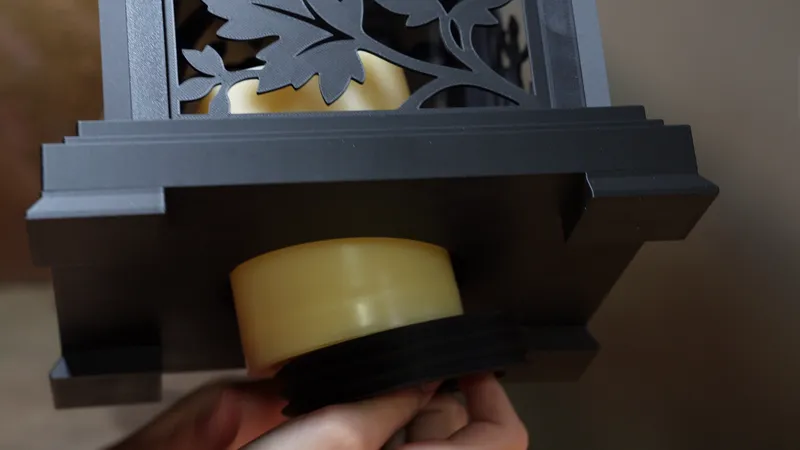
The lantern includes a removable access plug in the bottom so you can reach the light without disassembling the structure.
Place your battery-powered LED candle or light onto the access plug. Position the plug at the bottom opening, rotate clockwise to fix it in place.
The access plug can be removed later when you need to change batteries or adjust the light.
Changing the Panels
The structural components don't need to be reprinted when you want a different theme. The same base, frames, canopy, and lighting can be reused with different decorative panels.
Because the panels are captured by the flat top, swapping one means partially disassembling the lantern:
- Slide the canopy off the flat top.
- Remove the four upper locking sliders and lift off the flat top.
- Slide the old decorative panel (and acrylic insert, if any) up and out of its side frame.
- Slide the new panel in, then reinstall the flat top, the upper sliders, and the canopy.
The side frames and lower sliders can stay attached to the base. If you're using acrylic, you can keep the same insert or replace it with a different color.
Some possible configurations include:
- Fall-themed panels with warm LED lighting
- Halloween panels with darker or colored acrylic
- A clock panel combined with decorative side panels
- Open-sided frames without decorative inserts
Additional seasonal and clock panel designs are available on the lantern download page.
Final Thoughts
The Interchangeable Seasonal Lantern is designed to come apart as easily as it goes together, which makes it easy to maintain, customize, and reuse. Acrylic inserts add color and diffusion, different LED lights change the finished look, and the optional clock gives the same panel system a practical job.
The result is a lantern that only needs to be printed once, even if the decorative panels continue to multiply.
You can find the project, additional panels, and accessory information on the lantern download page. And if you're looking for more seasonal printing projects, check out my fall 3D prints post and video.