
So you've got a 3D printer. Now what do you print?
Fortunately, you don't need to know anything about 3D modeling to start making useful things. There are millions of downloadable designs online, ranging from simple phone stands and cable organizers to elaborate mechanical assemblies, cosplay armor, and replacement parts.
But here's something worth knowing before you start downloading everything in sight: not all 3D models are created equal. Some are ready to print with almost no effort. Others require special settings, additional hardware, or a little patience to get working.
Let's cover where to find models, what to look for before downloading, and how to turn that download into a successful print.
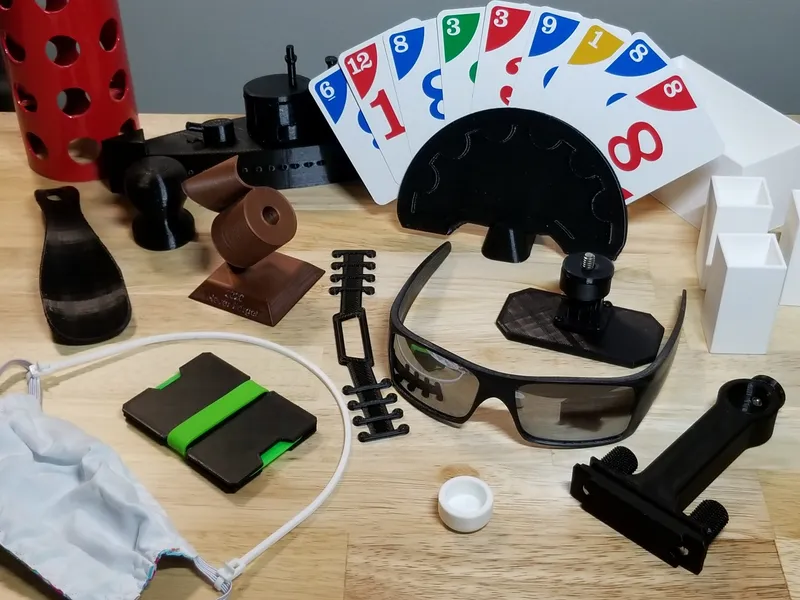
Before downloading and printing a model:
- Look for printed examples. Photos from other users are more convincing than computer-generated images for confirming that the model is printable.
- Read the description. Check for recommended filament, print settings, assembly instructions, and additional hardware.
- Check the dimensions. Make sure the model fits your printer and is the size you expect.
- Look for comments and makes. Other users may have already identified problems or suggested improvements.
- Check what's included. Some projects need multiple printed parts, screws, magnets, or other components.
- Check the license. Free to download doesn't necessarily mean free to sell the file, sell prints of it, or redistribute it.
My Top 2 Sites
There are several excellent websites dedicated to sharing 3D-printable models. All of them offer free downloads, and some sell designs as well.
You don't need accounts on all of them. Pick one or two to explore, then branch out when you can't find what you're looking for.
MakerWorld
MakerWorld is Bambu Lab's model-sharing platform and one of the easiest places for beginners to get started, particularly if you own a Bambu Lab printer.
One of its biggest advantages is the availability of downloadable print profiles. These can contain more than just the model: they may also include orientation, supports, colors, and other slicing settings.
Instead of figuring everything out yourself, you can start with settings that someone has already prepared. In some cases you can simply click "print."
That's convenient, but still review the settings. A profile prepared for a different printer, nozzle, or filament may need adjustment.
MakerWorld is best for:
Beginners, practical projects, multicolor designs, and convenient print profiles.
Widget KC's MakerWorld Designs
Thingiverse
Thingiverse is one of the established names in 3D model sharing, with a huge collection of community-created designs.
You'll find everything from replacement knobs and workshop organizers to toys and mechanical components.
Because many models have been around for years, you'll sometimes find extensive comments, user photos, and remixes. These can be extremely helpful when figuring out whether a design works.
Some older uploads may have sparse instructions or require a bit of experimentation.
Thingiverse is best for:
Functional parts, older community designs, replacement components, and remixes.
Widget KC's Thingiverse Designs
Understanding 3D Printing File Types
When downloading a 3D model, you'll encounter several file formats. Some contain just the object's shape, others include print settings, and a few let you modify the original design.
Here's what each file type does and when you might use it.
| File Type | What It Contains | When to Use It |
|---|---|---|
| STL (.stl) | The object's 3D shape, represented by a mesh of triangles. No colors, units, or print settings. | The most common option for downloading models to slice and print. |
| 3MF (.3mf) | 3D geometry, with optional colors, materials, orientation, and slicing settings. | Great for multicolor models or projects with prepared print profiles. |
| STEP (.step, .stp) | Precise CAD geometry, including surfaces and solid bodies. | Best when you want to modify dimensions or features in CAD software. |
| OBJ (.obj) | Mesh geometry, optionally accompanied by material, color, and texture information. | Common for artistic models, sculptures, and 3D scans. |
| G-code (.gcode) | Machine instructions telling the printer where to move, how fast, and when to extrude filament. | The output of slicing software, ready for a compatible printer. |
| ZIP (.zip) | A compressed folder containing one or more files. | Used to package multiple model parts, instructions, and related files into one download. |
Which File Should You Download?
For most projects, STL or 3MF is usually enough.
- Choose STL when you want the model's shape and prefer to configure your own print settings.
- Choose 3MF when you want a project that may come preconfigured, particularly for multicolor or multipart prints.
- Choose STEP when you plan to modify the design in CAD software.
One important distinction: STL and 3MF files describe the model, while G-code tells the printer how to make it. Your slicer converts the model into printer instructions.
Avoid downloading someone else's G-code unless you're certain it was generated for your specific printer and configuration. Using the wrong G-code can result in failed prints or potentially unsafe printer behavior.
Also, remember that a 3MF file doesn't always include print settings. Sometimes it contains only geometry, much like an STL. Always review the project in your slicer before printing.
From Download to Finished Print
Here's a typical workflow using a downloaded STL or 3MF file.
Step 1: Download the model.
Choose the STL or 3MF files you need. Extract any ZIP archive and read the included instructions.
Step 2: Open your slicing software.
Programs such as Bambu Studio, OrcaSlicer, PrusaSlicer, or Cura translate models into instructions your printer can follow.
Step 3: Import the model.
Drag the file into your slicer or use the import command. You should see the model appear on a virtual build plate.
Step 4: Check the orientation and dimensions.
Make sure it fits your printer and that the size makes sense. Review whether supports are needed.
Step 5: Select your print settings.
Choose the correct printer and filament profiles. For a simple PLA project, a standard profile is usually a reasonable starting point.
Step 6: Slice and preview.
The slicer converts the model into individual layers and generates the printer's instructions.
Before printing, inspect the preview. Look for excessive supports, thin features, unexpected gaps, and other surprises.
Step 7: Print and inspect.
Start the print and watch the first layer. Afterward, test the part's fit and function rather than assuming a good-looking print is automatically a working one.
That's it. You've gone from a design someone shared online to a physical object in your hands.